Malifaux – Ten Thunders Torakage

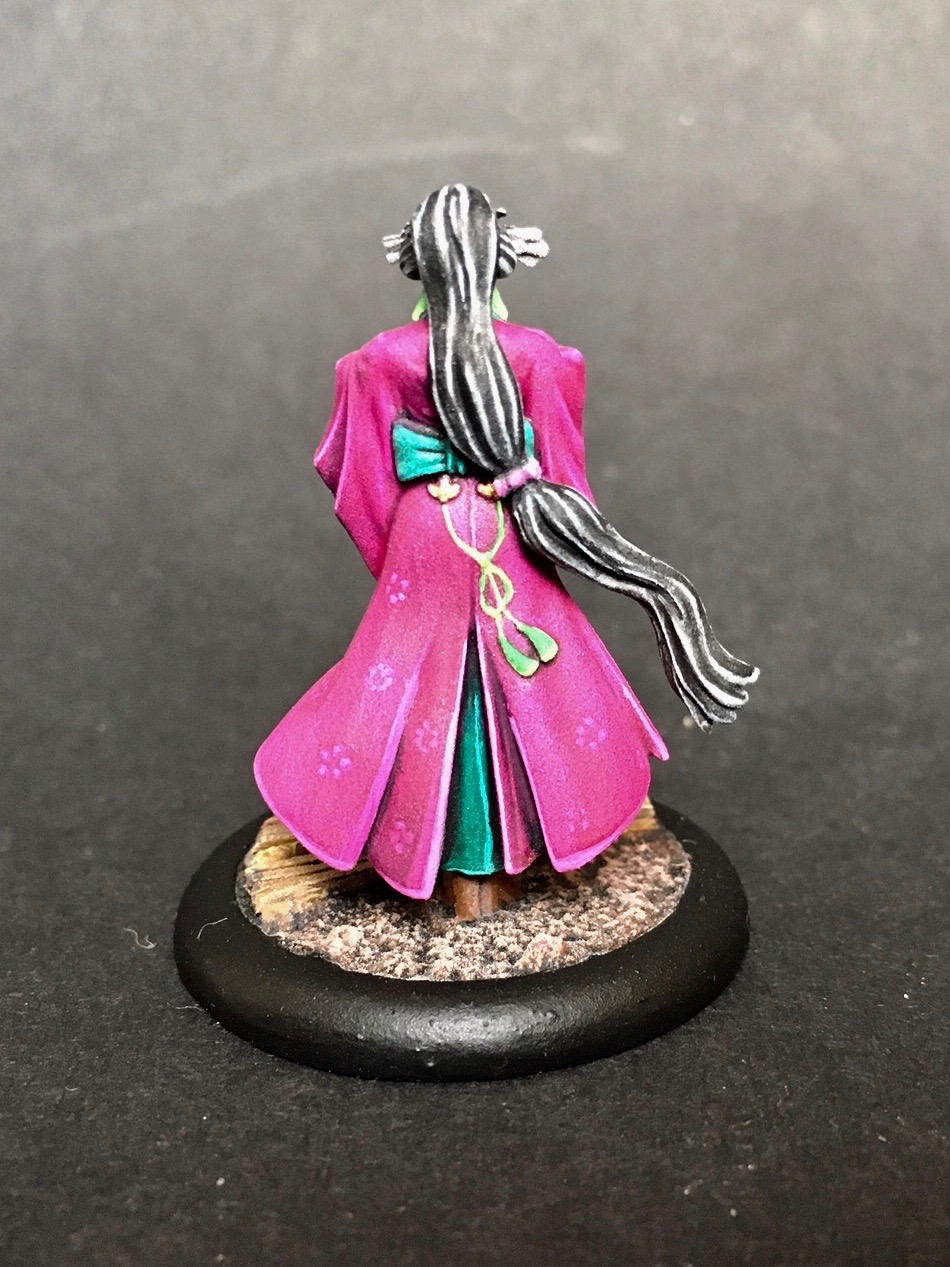
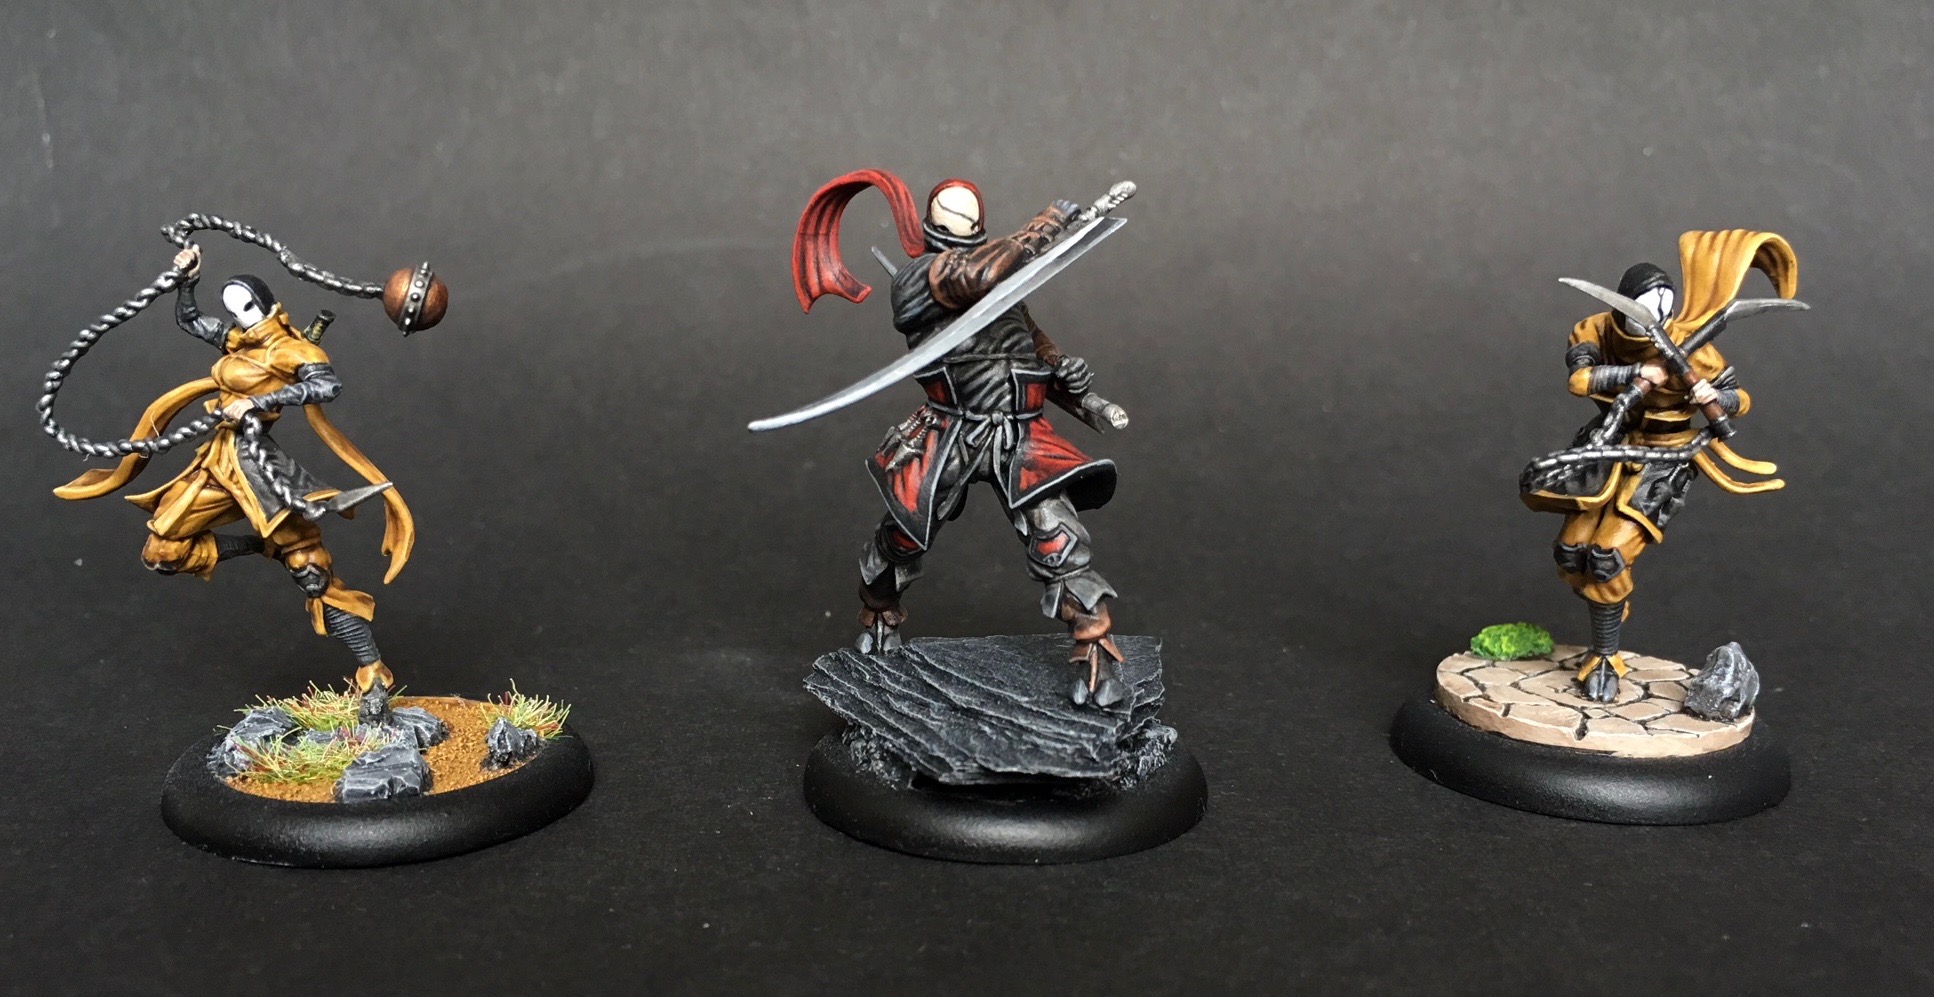
Torakage belong to the “Last Blossom” sub-faction of the Ten Thunders, specializing in stealth and infiltration

Coming with the Misaki Ten Thunders box, these dudes are basically the ninjas of Malifaux. The sculpts are great, making the washes do most of the shading for you; and the poses are classy, too. I continue trying out different base variants, extending my repertoire of basing techniques. Since you usually field just one or two of the ninjas you can pick the one with the base fitting best to the terrain.


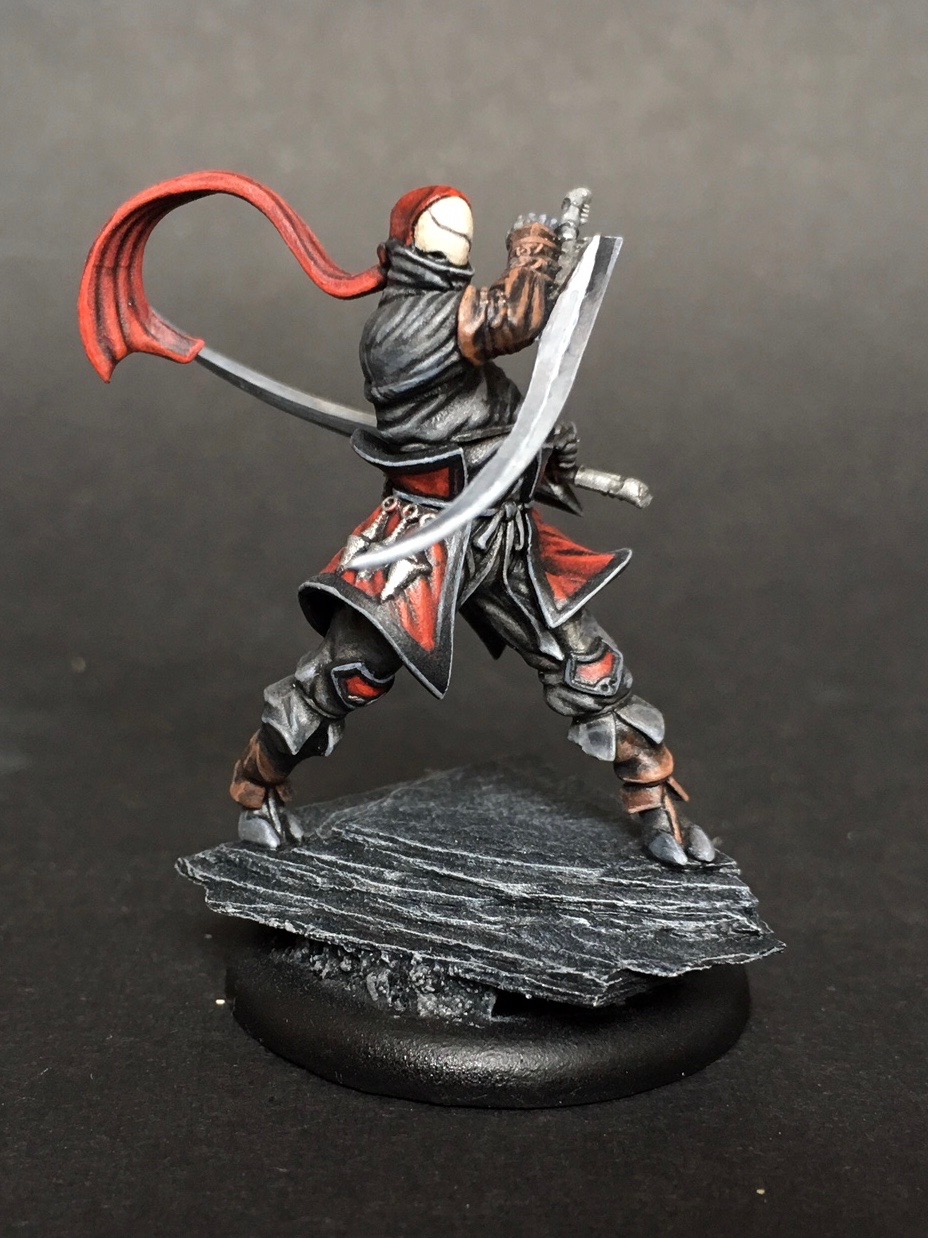
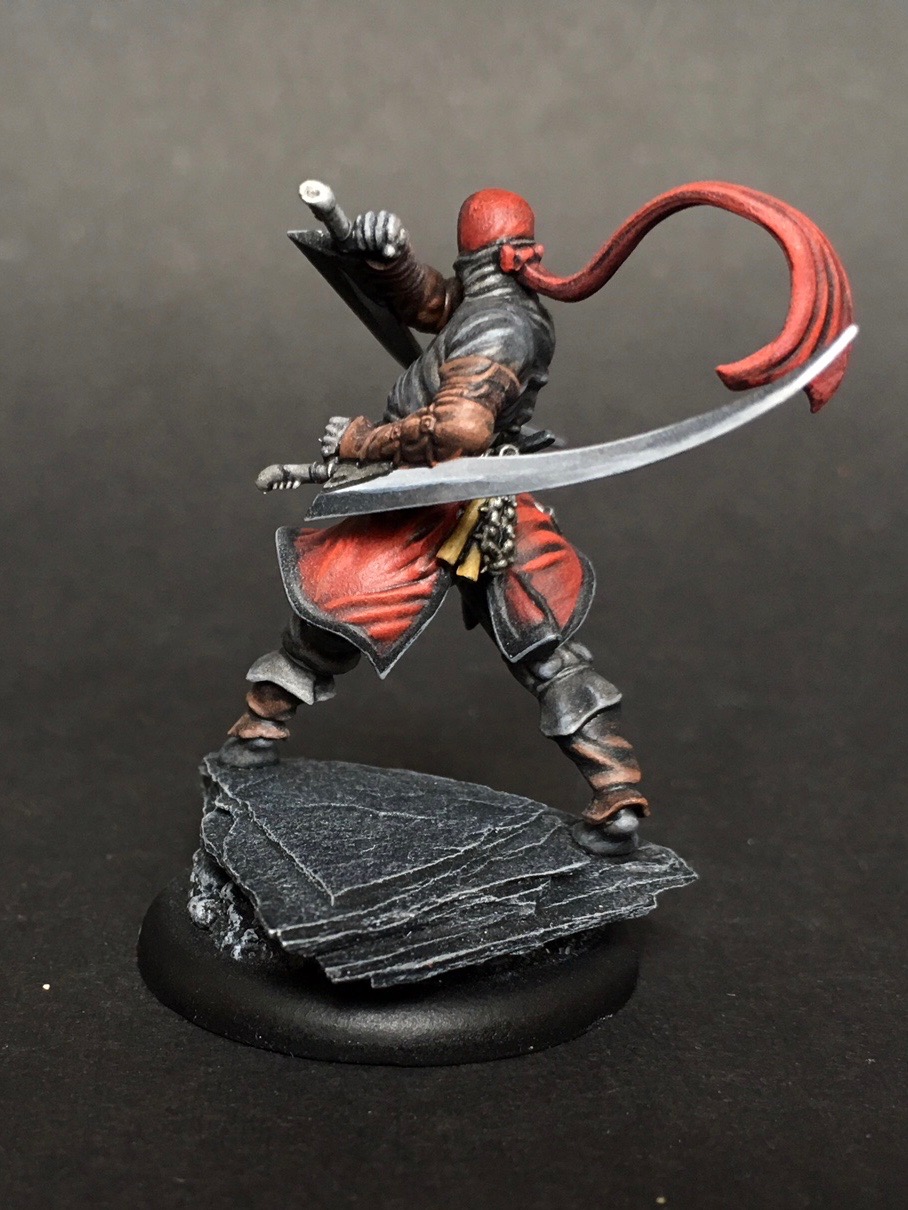
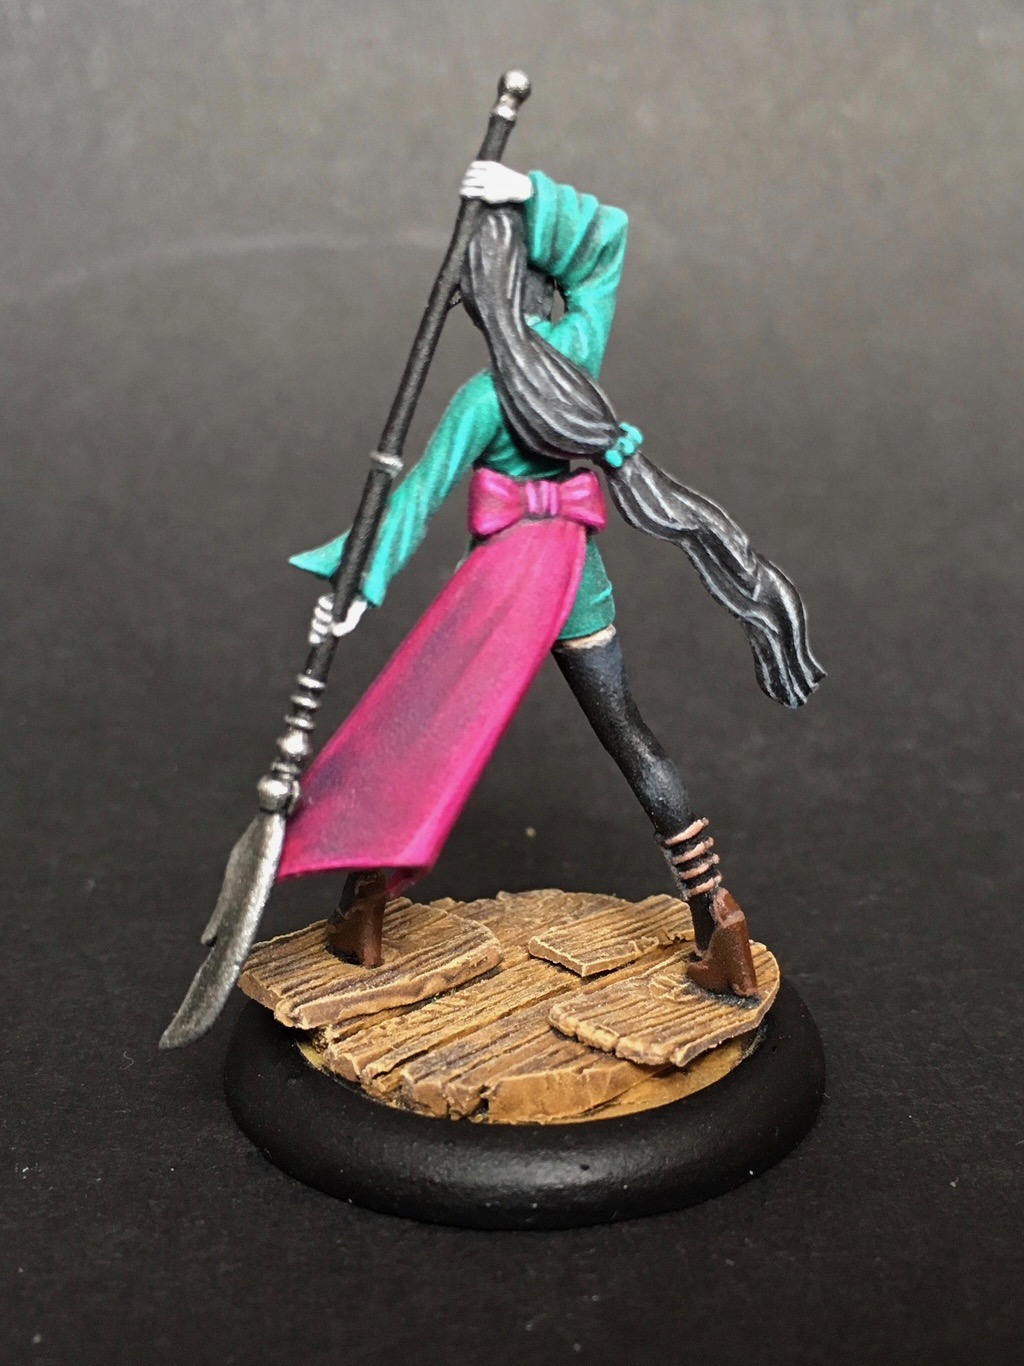
While on the box art these guys are clad in yellow I wanted to paint at least one in black, the typical ninja outfit. All-black was to boring , however, so I painted parts in red to make him stand out more. Since his feet are too wide apart for his 30 mm base I used a piece of slate from the local quarry onto which the model fits perfectly! Again, the idea was that the base complements the model itself; and the easiest way to support a black model was a black rock.

Painting the model I started with the red fabric. The lower part of the knives stuck on the kilt are actually not the blades but pouches, a mistake I realized when painting the third model where I got it right. But the details are so subtle sometime that mistakes as these are bound to happen. I painted the rest of the model grey and then used a mix of black wash, medium, and regular black paint. I subsequently took some time – since there are not many details to paint – for the highlights, really trying to get some smooth color blends. In the end I made such a good progress that I went for nonmetal metal on the blades, which blended even better in the overall black-grey appearance. Looking back I am really happy with the result – don’t know what I could have done better (except painting the pouches properly).


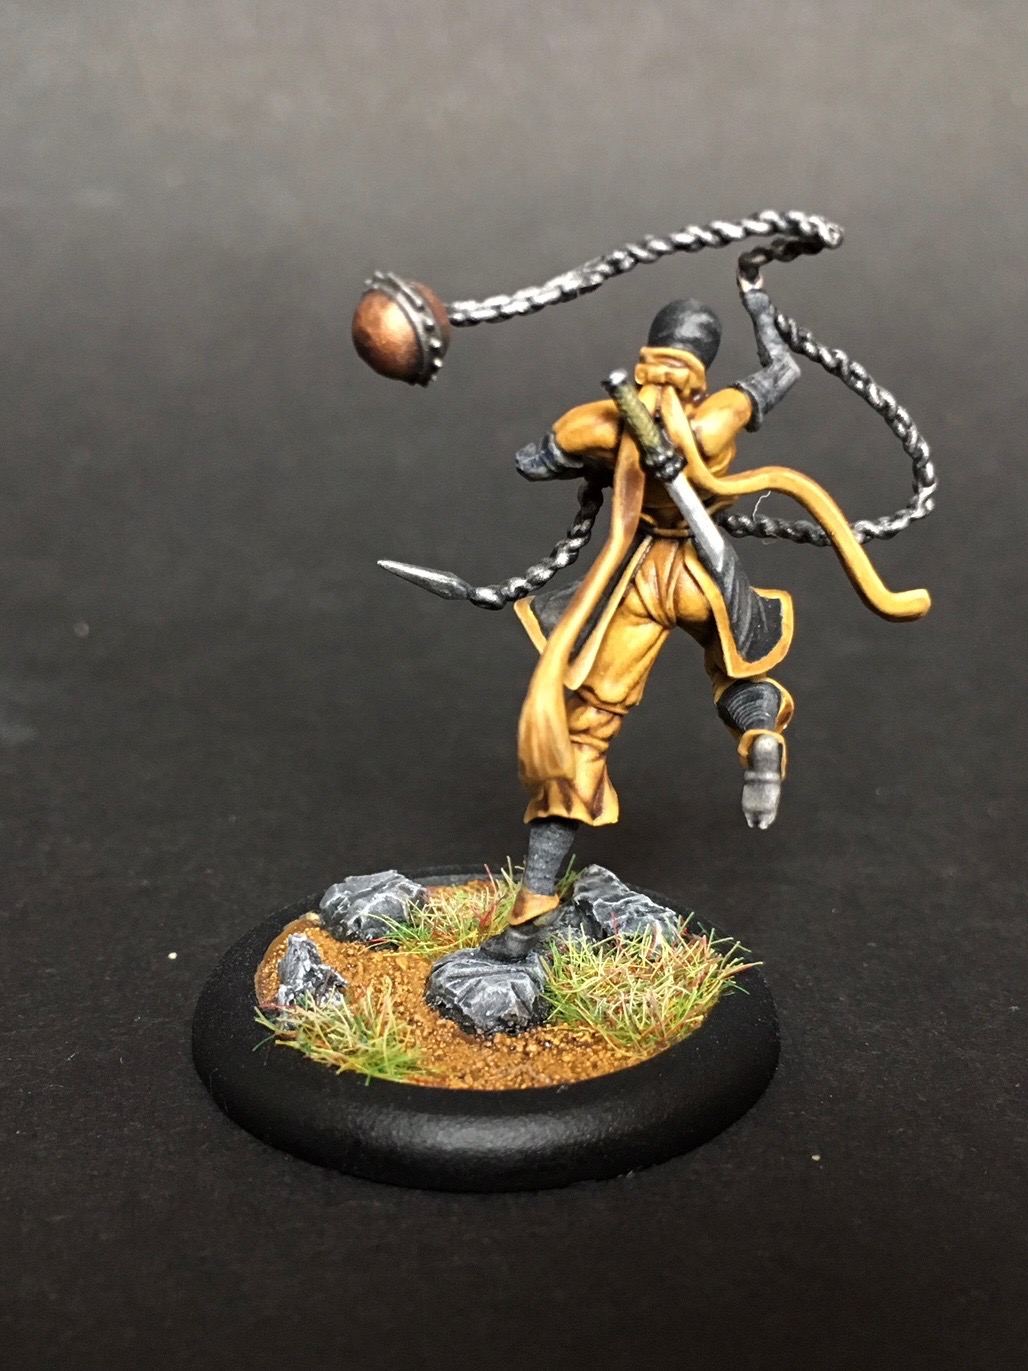
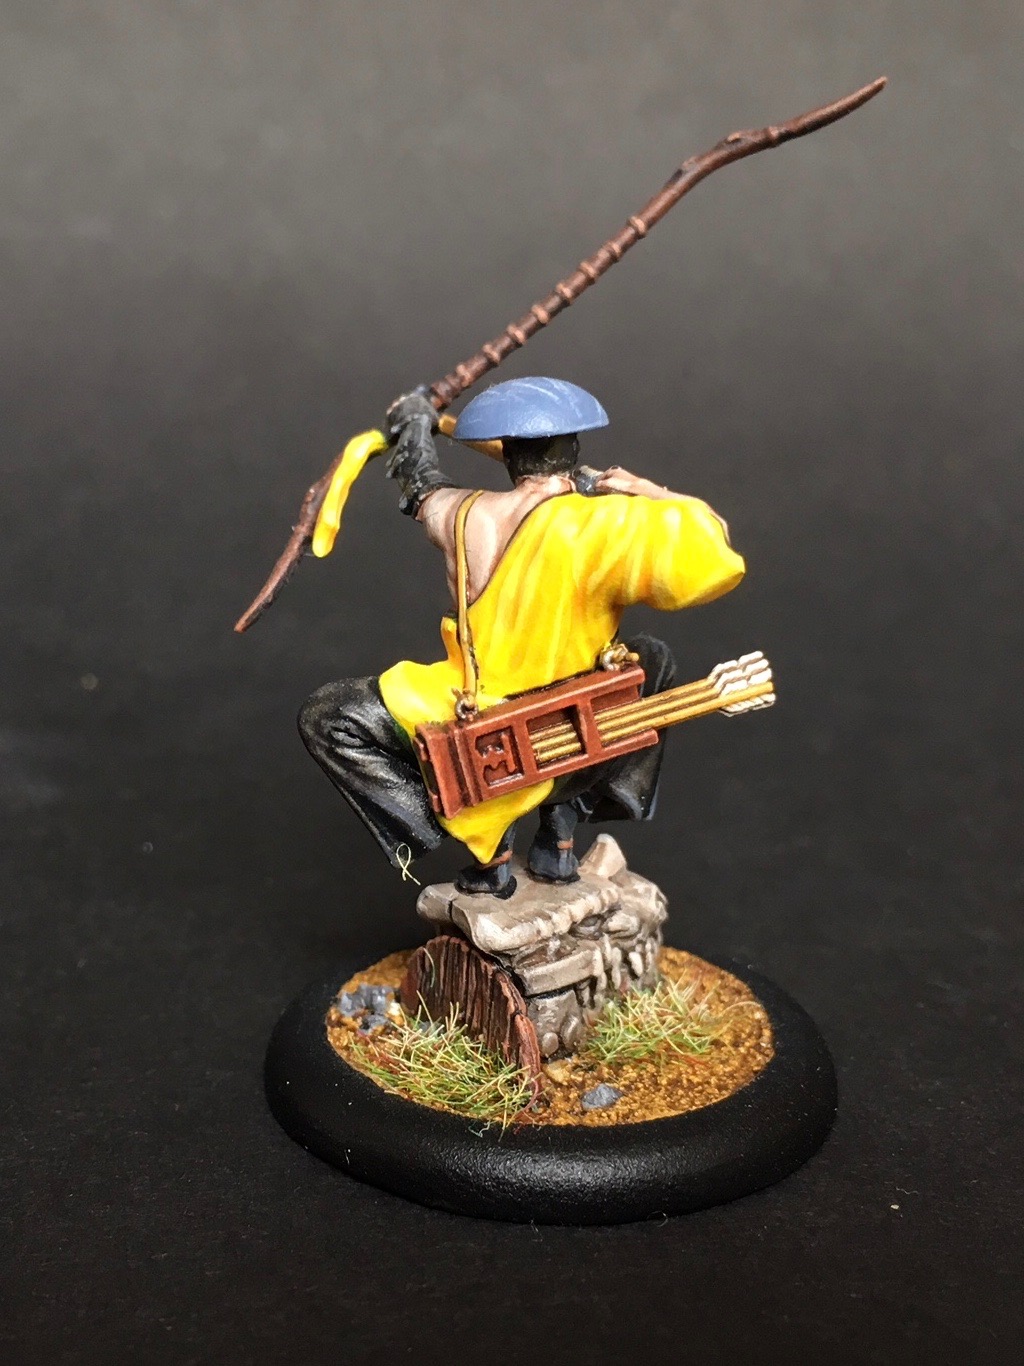
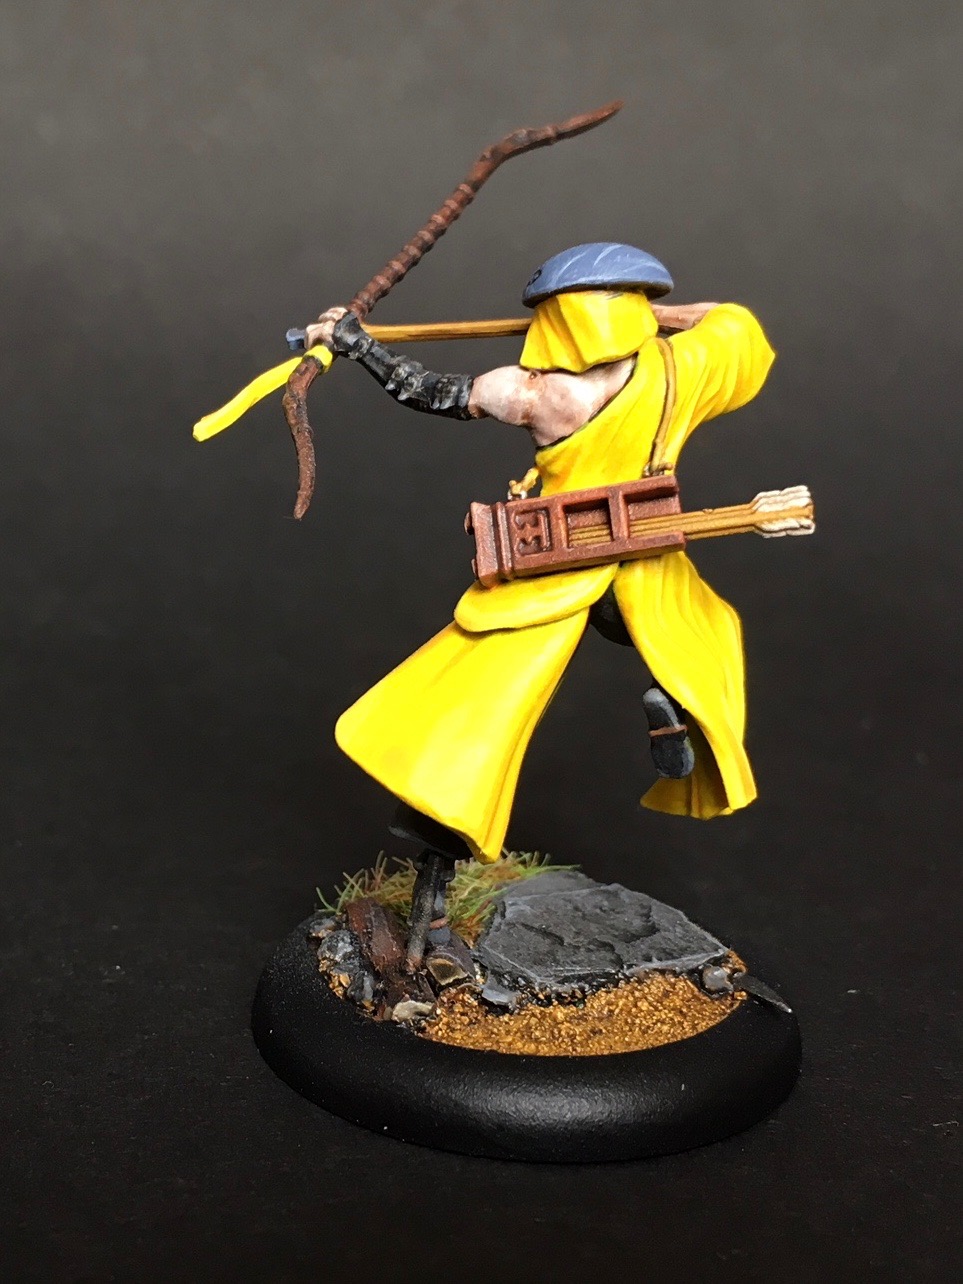
My second favorite sculpt of the threesome. For the remaining two Torakage I went with the official box art color scheme, only replacing the bright yellow with an stronger ochre tone. For one thing the ochre (GW Vermin Brown/ Zamesi Desert) has a much better opacity than yellow, and it can also be more easily and convincingly shaded than yellow. For shading I used GW Agrax Earthshade. If I could have only one wash in my collection, this is the one I would choose, even above black wash. It’s so universally usable! After the wash I only did some very sparse highlights with an ochre-white mix. There is not much more necessary, really, as the wash does 90 per cent of the work for you.

The larger black rocks are actually pieces of plastic with edges chipped off, so I could glue plastic on plastic, though I managed to drill a whole through the foot and pin it to the rock for added stability. I spent some more time highlighting the chain since I really wanted add depth to the chain links.


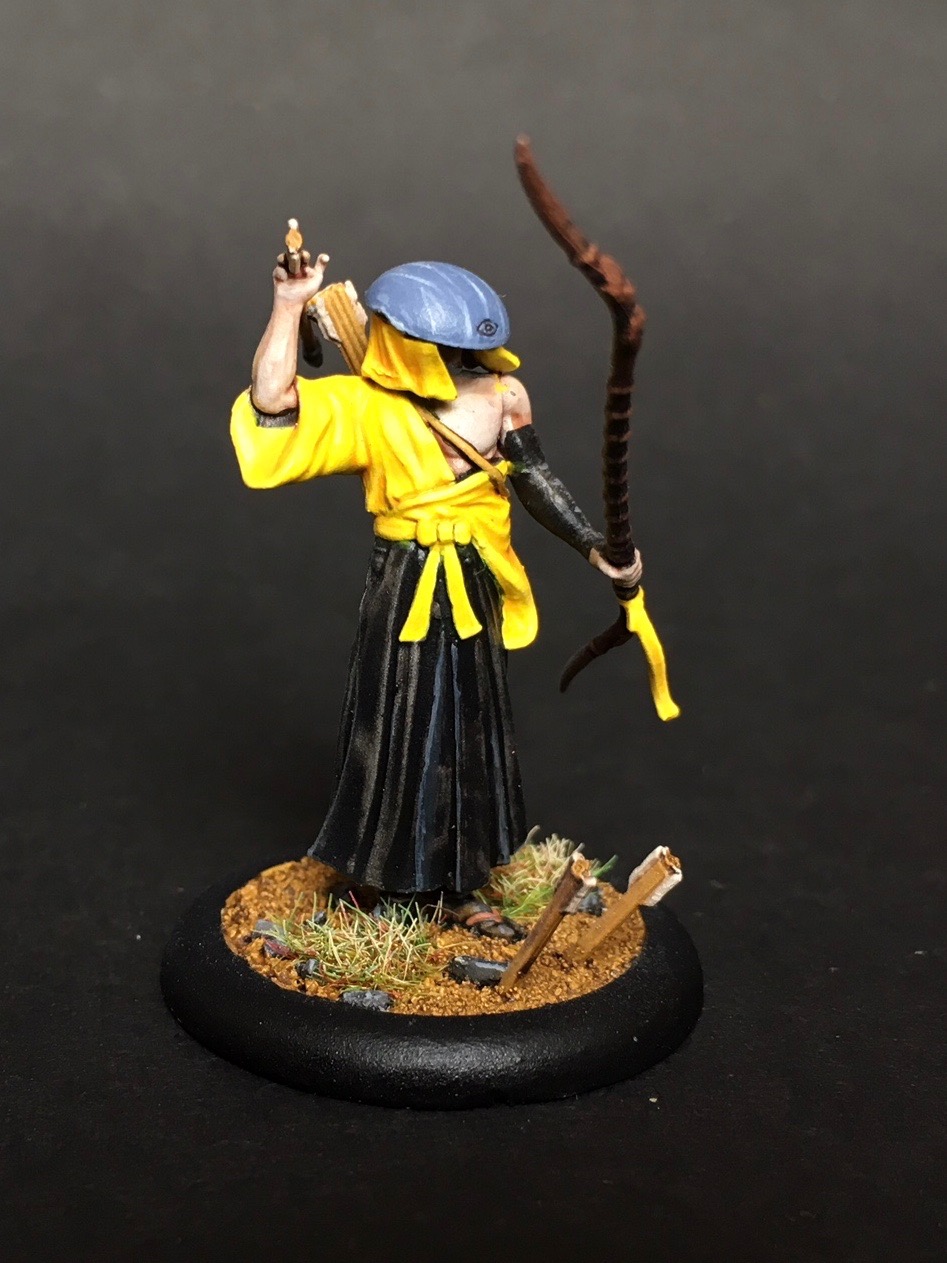
This is probably the least classy model. The base is actually a sculpted base by Wyrd; never thought I would spend money on sculpted bases. (I think I got the blister so the order would be postage free.) Color-wise, as with all the Torakage, I really limited my color palette, refraining to use, for instance, different colors for the knee or arm protectors. It’s tempting every time (all these colors I have that want to be used!) but in most cases the model benefits from a limited palette, especially if it is well sculpted and there is so much going with respect to shades, highlights and composition/pose, as it is the case with the Torakage.

Malifaux – Oiran

Oiran from the Ten Thunders Faction. You better do what they say.

Another box from my first Malifaux purchase at Salute 2017, the Oiran are some sort of geisha spies from the Ten Thunders faction. I had a traumatic experience with them when the matt varnish spray resulted in a powdery white cover. Since I used strong, vibrant colors with the models I had to repaint about 75 percent of them. D’oh! A quick research in the internet revealed that this is a widespread issue with matt varnish spray, and there are literally hundreds of blog entries on the topic. In this case the newly bought GW spray can was apparently from a bad batch.


This is the first model I painted and I like it the most. It’s probably because the freehand work on the kimono, though easy, came out better than expected. You can still see the white speckles from my matt varnish spray on the jade green dress and on the hands, which I didn’t bother to repaint. The face is ridiculously small and I couldn’t put down to red dots in symmetry. The highlights on the hair look very strong on the photo but in real life they come out just fine. All in all it was fun to paint.


After the varnish accident I had to repaint the hair, stockings and weapon of this mini. The other parts still have a greyish veil – the colors were much stronger and brighter before. It still bugs me when I think about it. The stockings looked much better before – it took almost one hour to paint them the first time – but couldn’t motivate myself to spend as much time again.

I tried to do some wood for the bases as I have never done wood before. Here I used matches for the floor and put some pieces from the backside of Warhammer plastic shields on top. The reason for this peculiar design is that I wanted to glue the model directly onto a plastic surface, as it is tiptoeing on geta/high heels and the strongest bond you get is with a plastic-plastic connection (pinning again being out of question). It looks kinda odd but at least it stands firm.


This model took me longer to paint than the other two, main reason being the fans. In hindsight I feel I used too many different colors – should have made that orange fan purple, too. Again you can see the parts which still have a white varnish-dust (stockings, base, right fan). I refrained from doing freehand patterns on the fan even thought I was tempted. But that “dust varnish” experience had broken my spirit and at that point I just wanted to get the models finished and start something new. I guess I still can come back later to add some fancy patterns.

Malifaux – Lone Swordsman and Ten Thunders Archers

Lone Swordsman and Archers from the Ten Thunders Faction

After finishing the Guild models I bought with the Starter Set I went ahead to paint the Ten Thunders models I bought at Salute. Let’s have a look at them.


Before I get to the paint job, a word of warning: the kit is awful to assemble. Check out the various tutorials on the web before you start assembling them or you will meet your Waterloo. 20 years of modeling experience didn’t prepare me for this. The head is the worst part, consisting of 4 parts (the veil is made of 2 pieces), three of which fit ambiguously into sockets and all need to be glued simultaneously. I had to scrap a veil of one model. The finished models look very nice, however. I read somewhere that the archers were some of Wyrd’s early plastic box sets (alongside the Ten Thunders and Jacob Lynch boxed set), and it shows. More recent models are said to be better, very much hope so.


Painting was the easy part, really. Although yellow is a hard color to highlight, I used a rather quick and easy method, painting the parts in a very light yellow (GW Bad Moon Yellow, yes I am that old) and then adding some thinner medium (GW Lahmian Medium) to Golden Yellow (Yriel Yellow) and using that mix as a wash. I then added some white to the Bad Moon Yellow and sparsely highlighted the model. You can achieve better results with building up the colors but this is a much faster way. After some more experience with yellow I now go with a mix of Golden Yellow, Anthrax Earthshade and medium, which makes the shadows more shadowish and less yellowish. Check out my Ototo (upcoming).

I also discovered an easy way get nice shades and highlights on the black trousers (which you should paint before the yellow parts): Just paint the trousers white and paint over them with a mix of medium and black. I’t important not to use water, and this mix is also not the same as black wash (or Nuln Oil). This creates deep black shades and almost perfect highlights. The only disadvantage is that adding highlights didn’t work very well since grey, even if it has the right lightness, looks different than the white shining through. So if you look close enough you can see the difference between the raised parts where the white shines through and the parts were I added a grey highlight.


The other challenge was to glue the models to the bases, especially the one above jumping sideways. I went for the right way (don’t do it the Homer Simpson way!) and ruthlessly pinned the trousers because the true scale bunion just is too small for the smallest drill. I planned to cover up the pin with some moss but ended up leaving it as it is since it is barely visible anyways.


Finally the Lone Swordsman, a samurai, really. As a kendo practitioner I feel a strong bond to this guy. And he has some  cool rules. One – “You shall not see another sunrise”– reactivates him while declaring to kill another character. If he doesn’t kill at the end of the turn, he commits seppuku. Awesome!

Paint job was fairly straightforward, using the same method for painting black as with the archers. In hindsight I would have better painted that lower arm protector brown as well. I consciously try to limit my color palette, but in this case some more wouldn’t have hurt. I went for nonmetal metal with the sword, just copying what another guy had done. The face was scary, he has a beard but it is so small you have to imagine it. Especially the mustache part was hard. I also used gloss varnish for the breast amor because the Japanese lacquered a lot of their amor parts.