Malifaux – Ten Thunders Misaki, Shang and Ototo

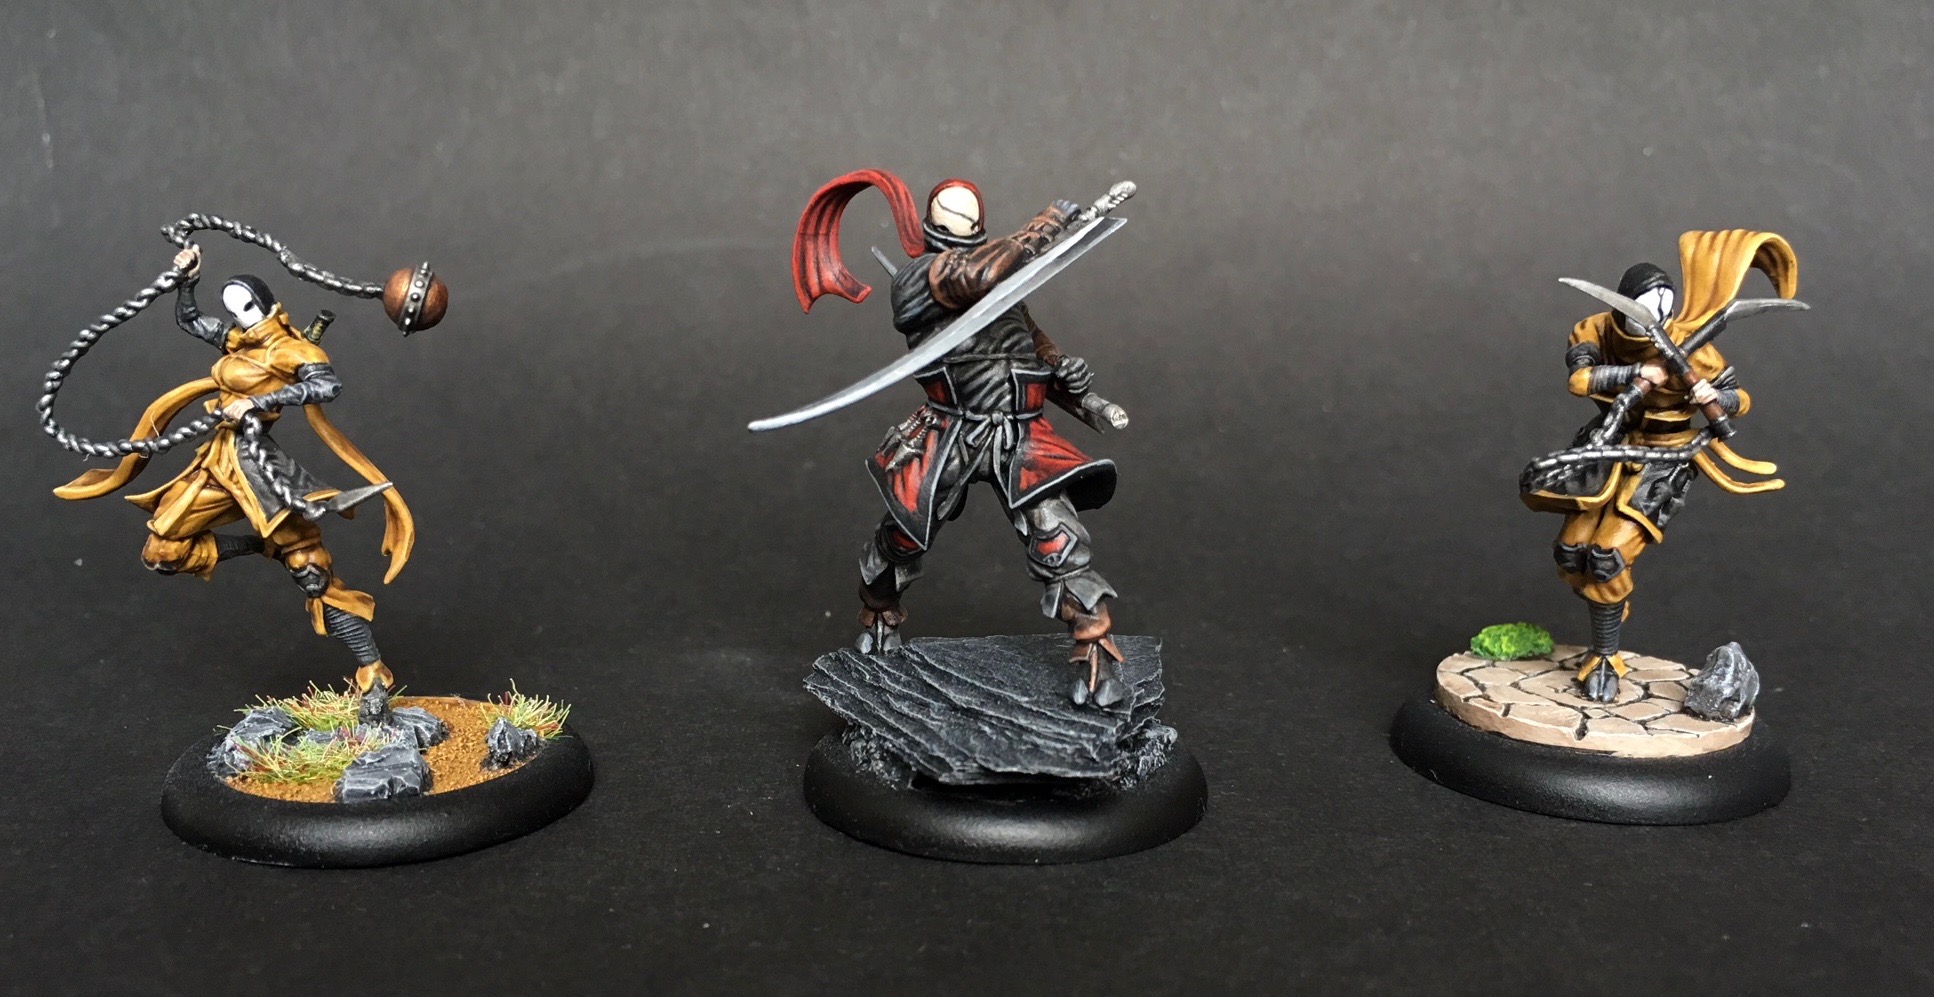
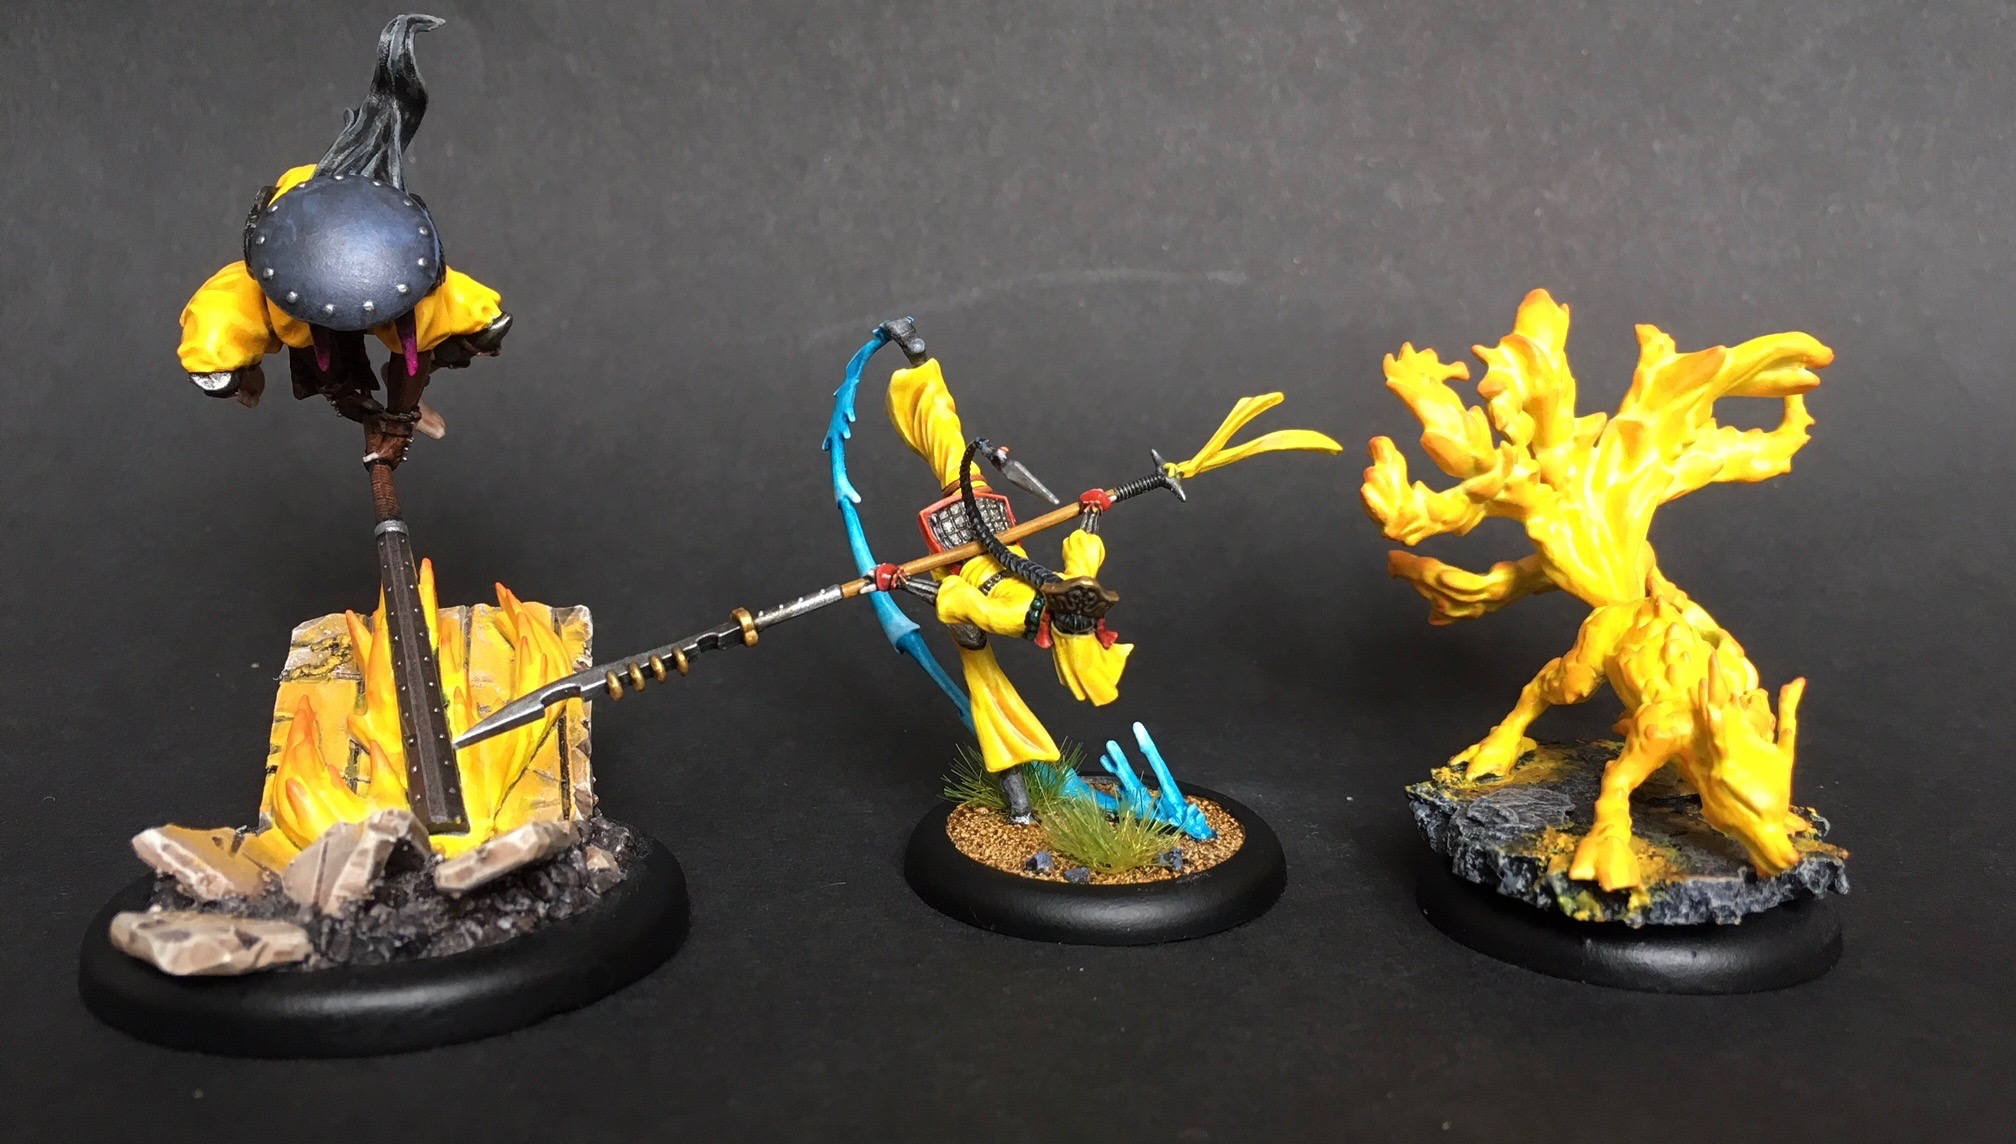
“Little brother” Ototo, Misaki, and her Totem Shang

I painted these models from the Misaki box set last, as I wanted them to look best, and also because I was a bit scared painting them. Despite using similar colors each model provides a totally different painting experience.

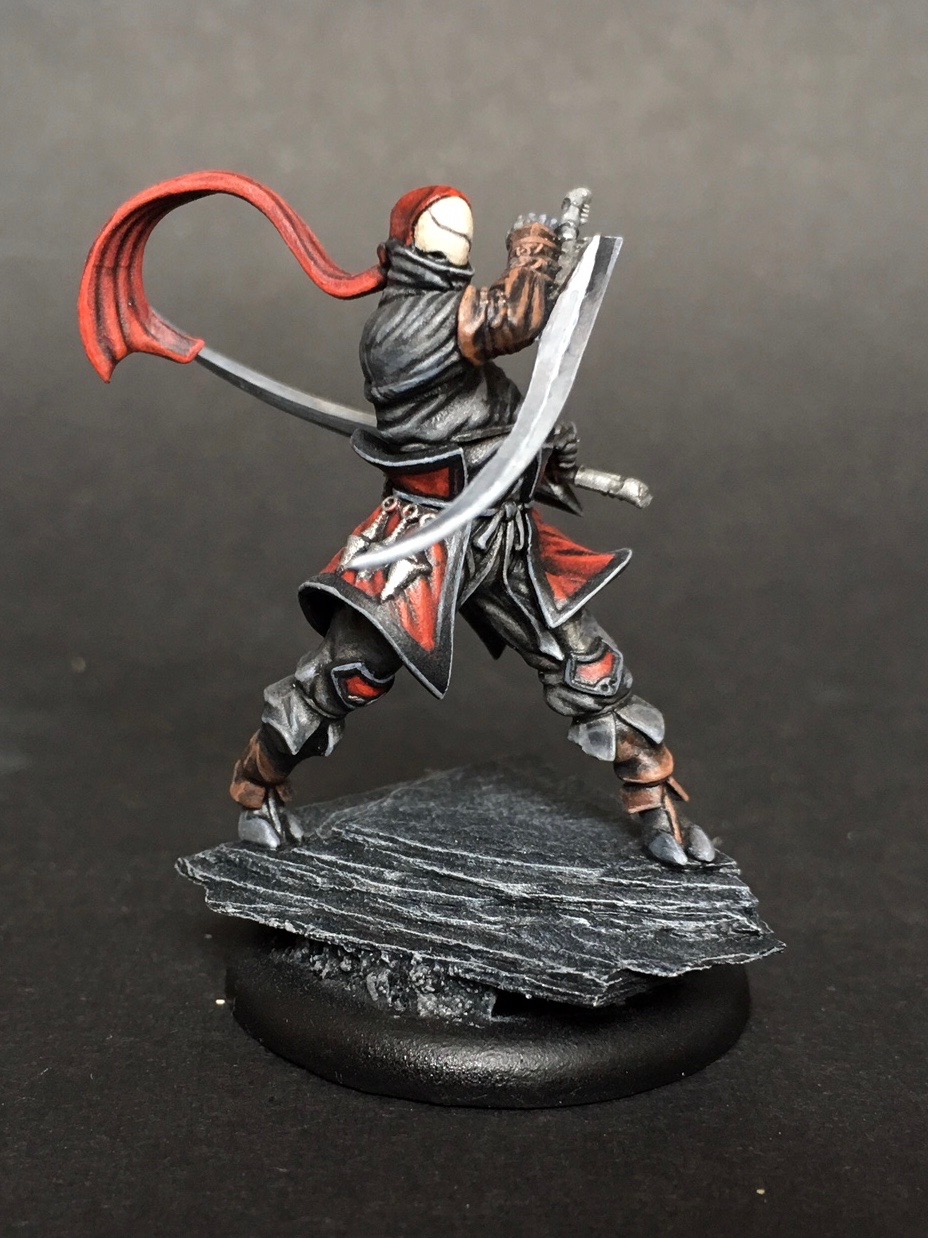
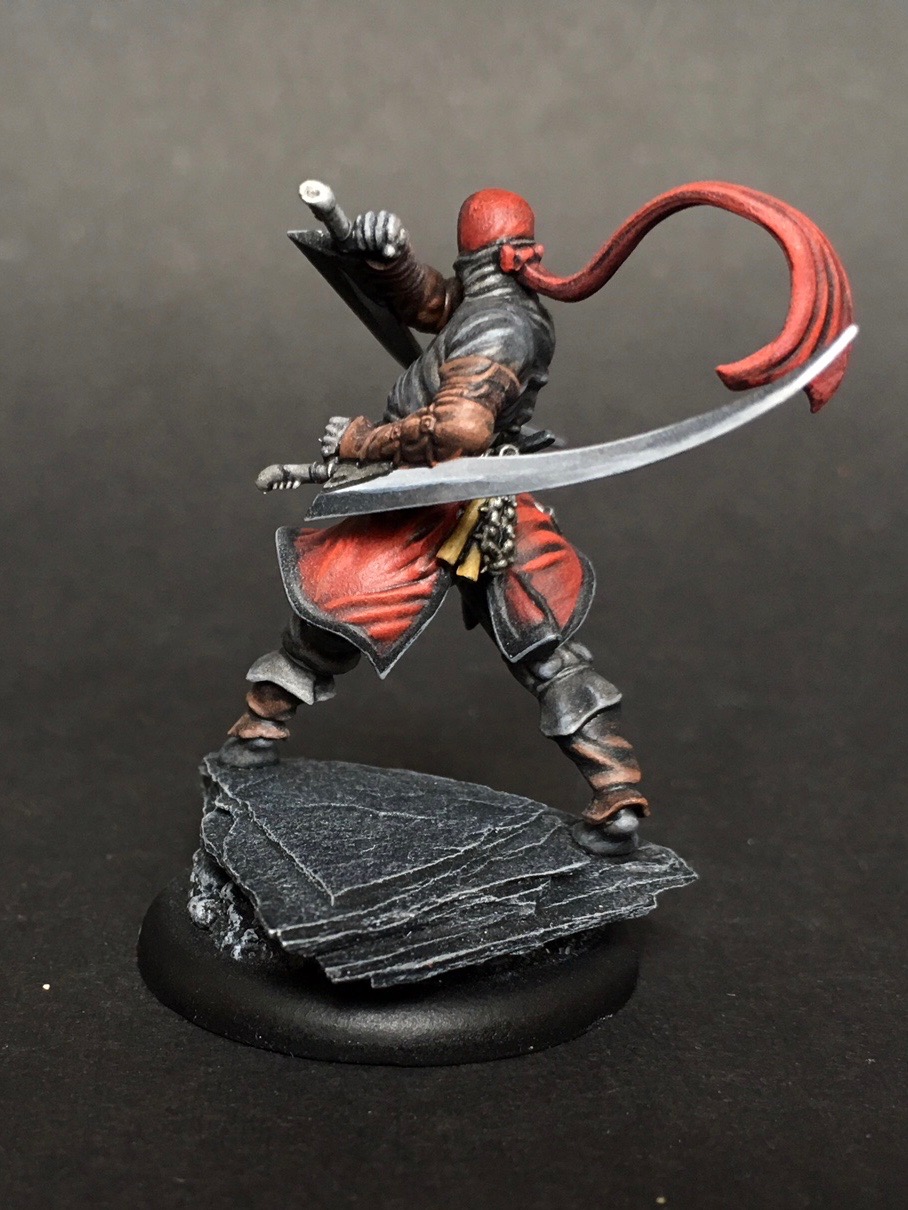
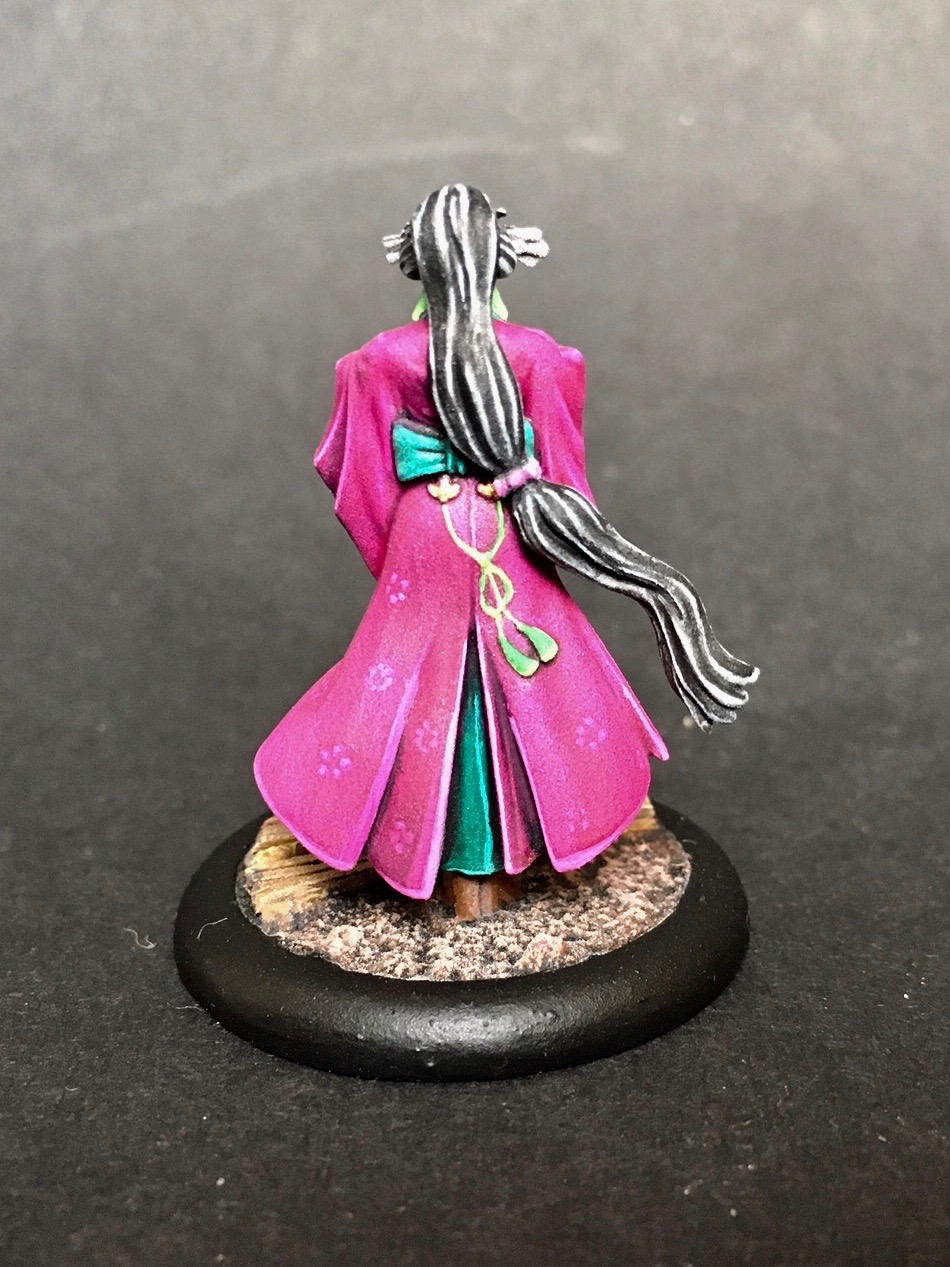
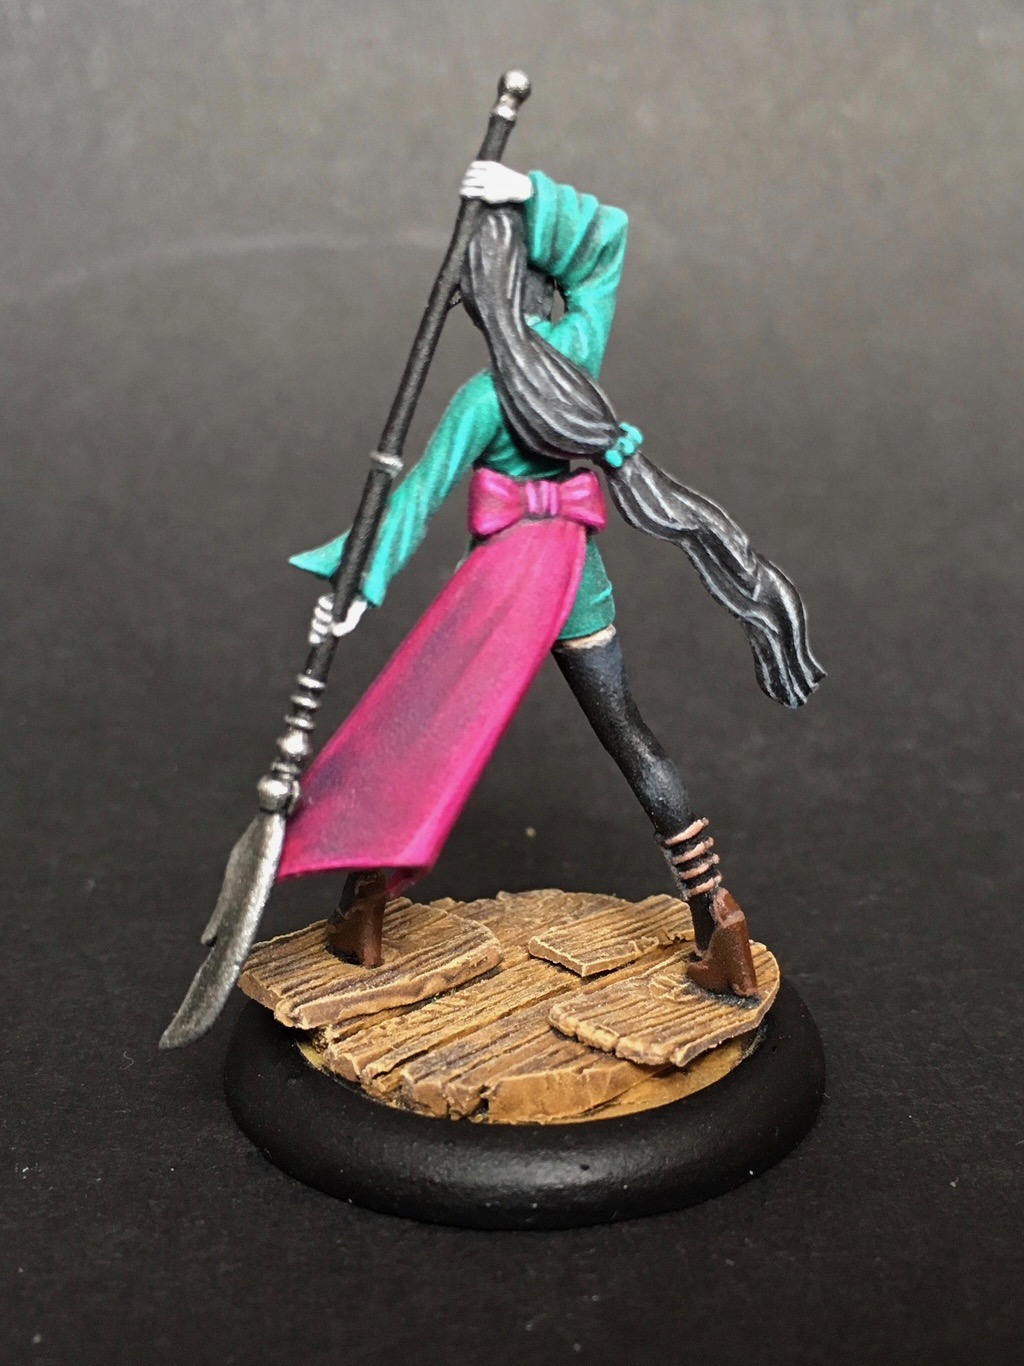
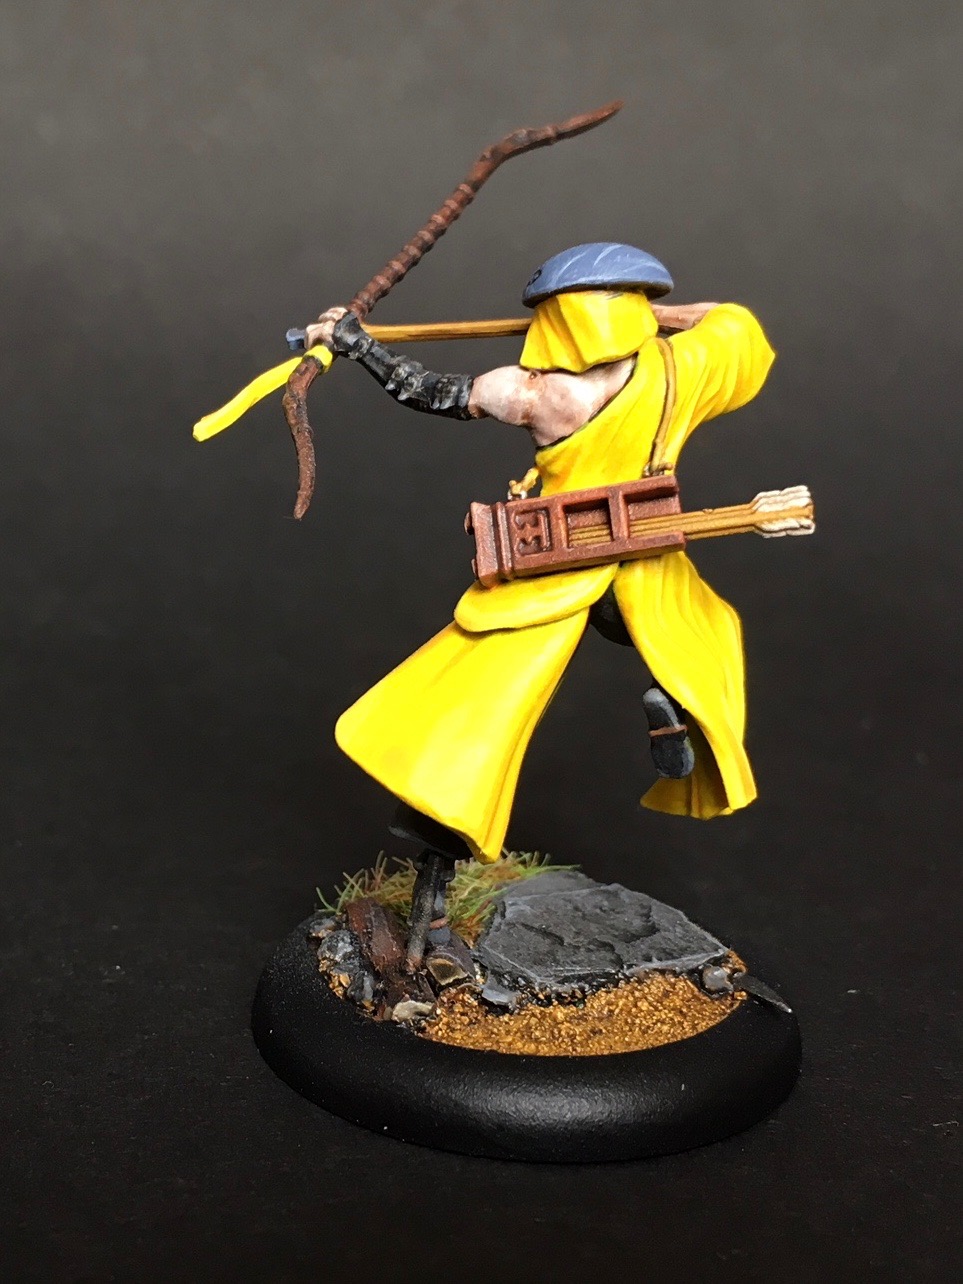
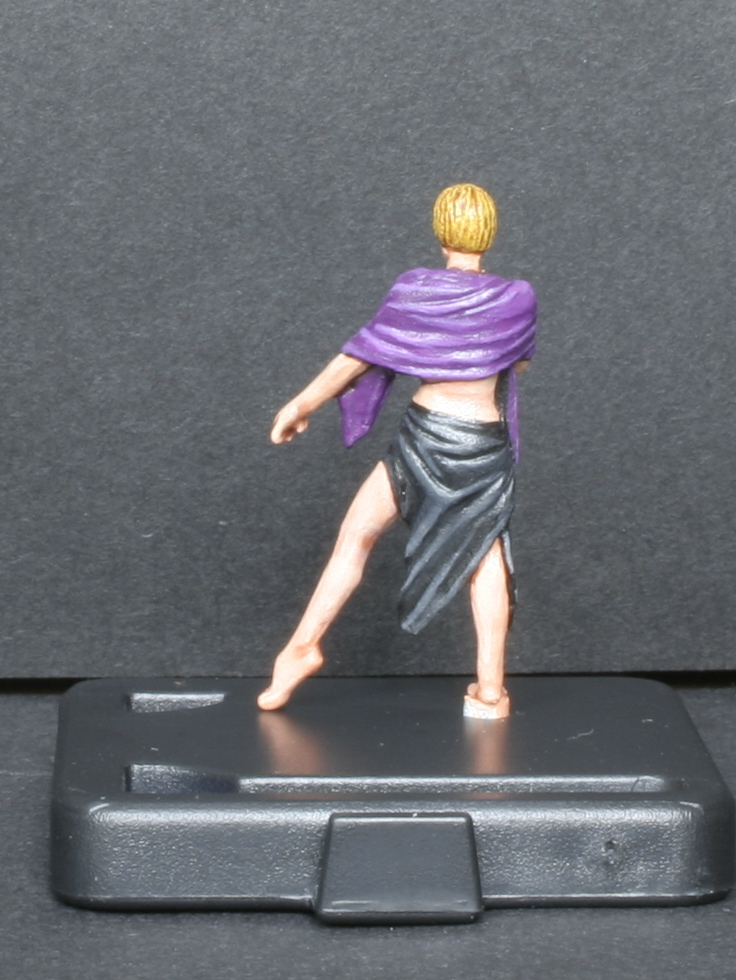
Misaki, Dual-Faction Ten Thunders / Outcast Master


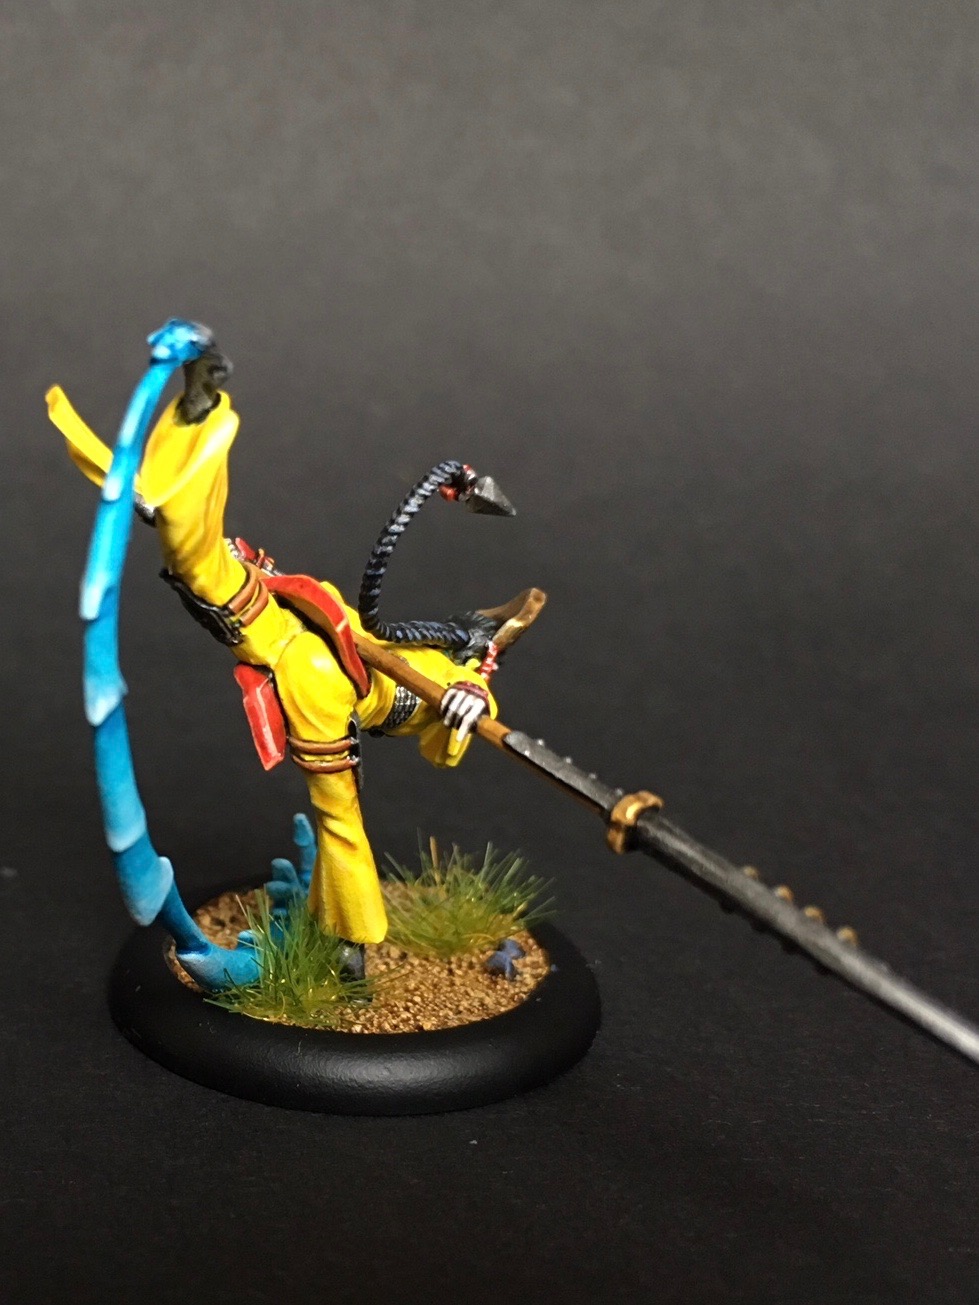
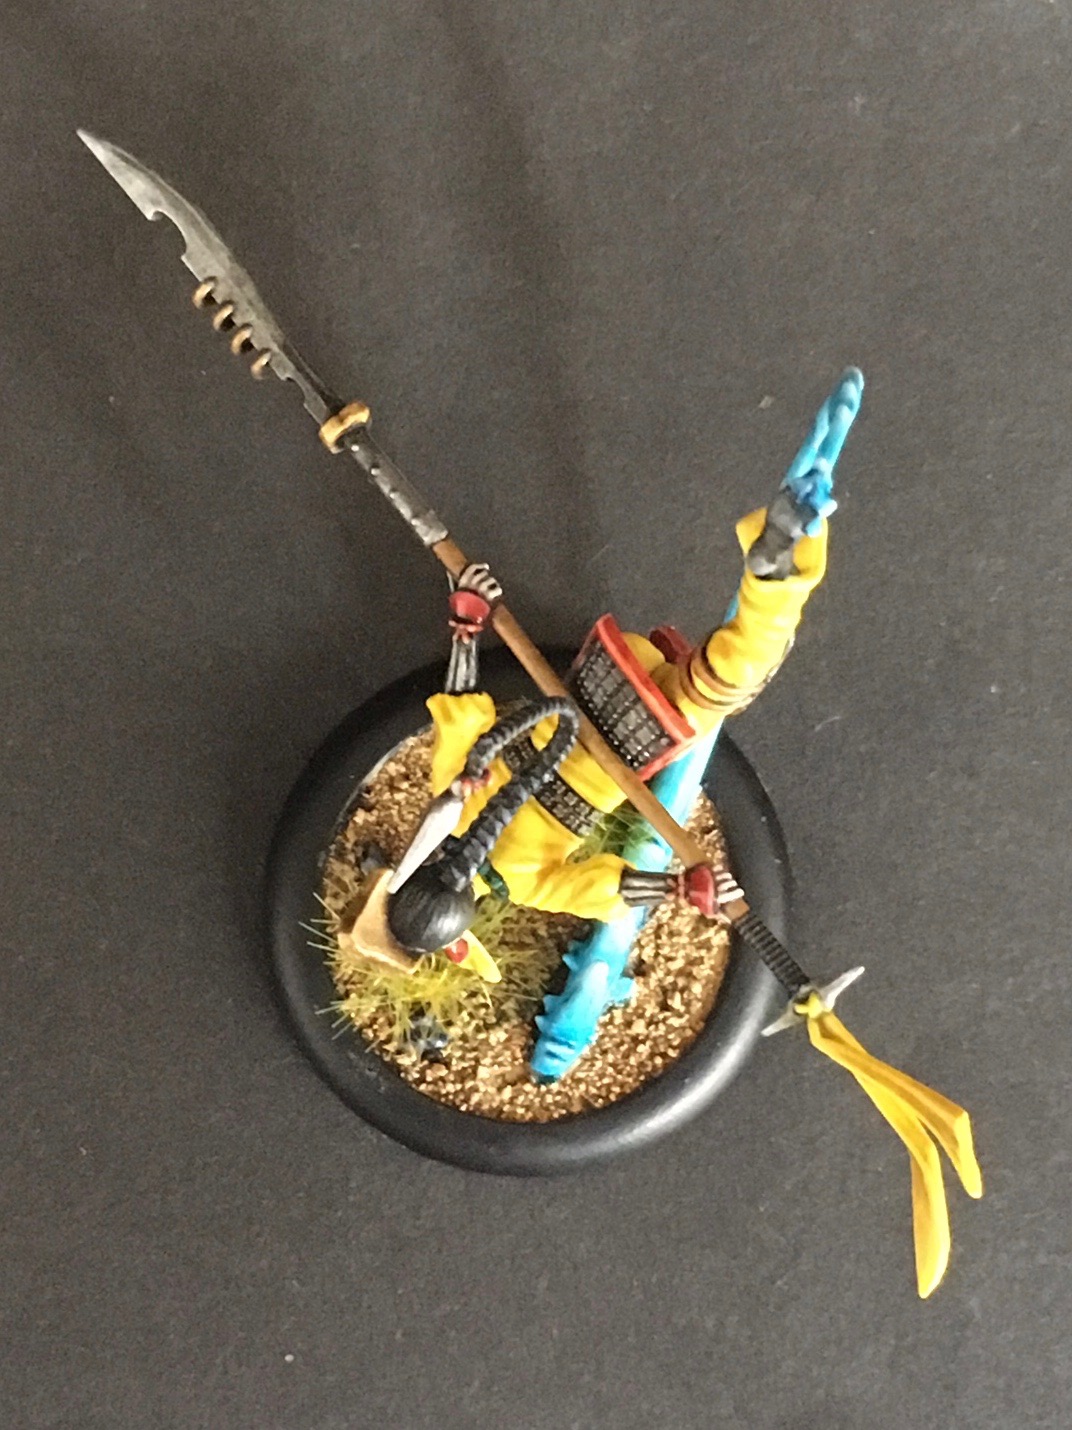
Originally I wanted to paint the Ten Thunders master last, but I was at loss as to what to do with Ototo’s “Tetsubo-splash” so I painted Misaki first. I didn’t like the “leg swoosh” but it is important for stabilizing the model, so I built it as intended. I pondered briefly painting some flower patterns on her pants, as on the box artwork, but quickly dismissed the idea. For once, the model is so delicate that it is really REALLY difficult to do convincing freehand patterns if you are not a pro painter. And secondly, it would have been even more difficult since any mistake would have been difficult to fix with yellow having such a bad opacity property. So in the end I decided to just paint her as neatly as possible, which is challenging enough!

As with the archers I used the very bright GW Bad Moon yellow as a basecoat. For shading I added some brown wash to a mix of GW Lahmian Medium and Golden Yellow (Yriel Yellow), which definitely is an improvement over just thinned Golden Yellow since it makes the folds look more shadowy and not just dark yellow. The rest really is just more or less neat painting with some highlights. I didn’t dare painting eyebrows on, and I next time I would use  more subtle colors (just white/grey) for the leg swoosh effect, since I want it to be as discreet as possible (plus, Misaki herself is already colorful enough). Anyway, I left the model as is since I was running out of patience at that point.

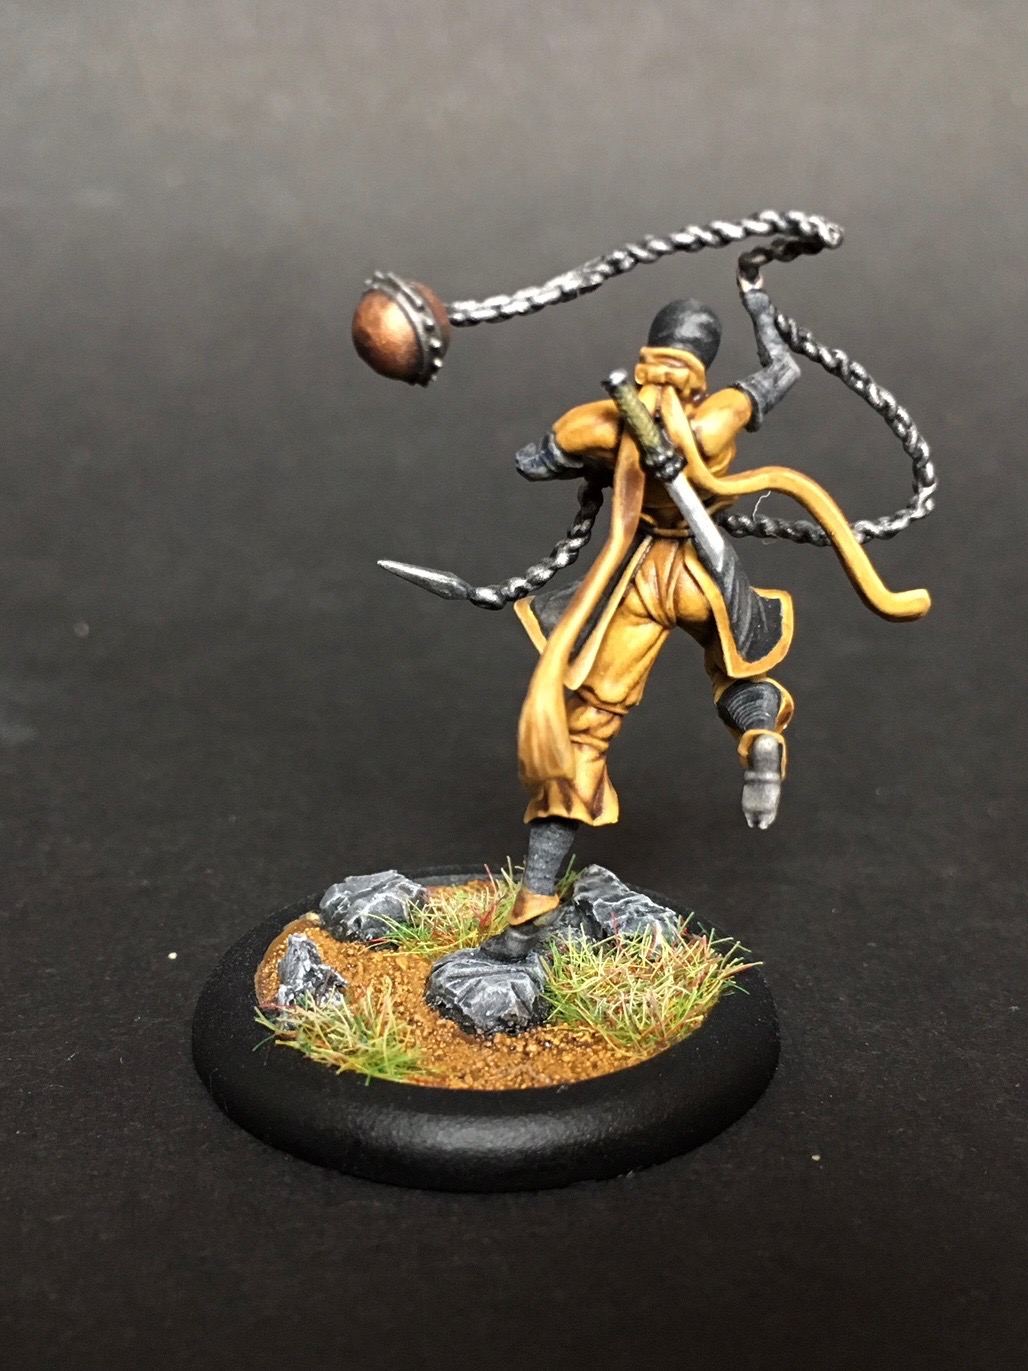
Shang, Misaki’s Totem


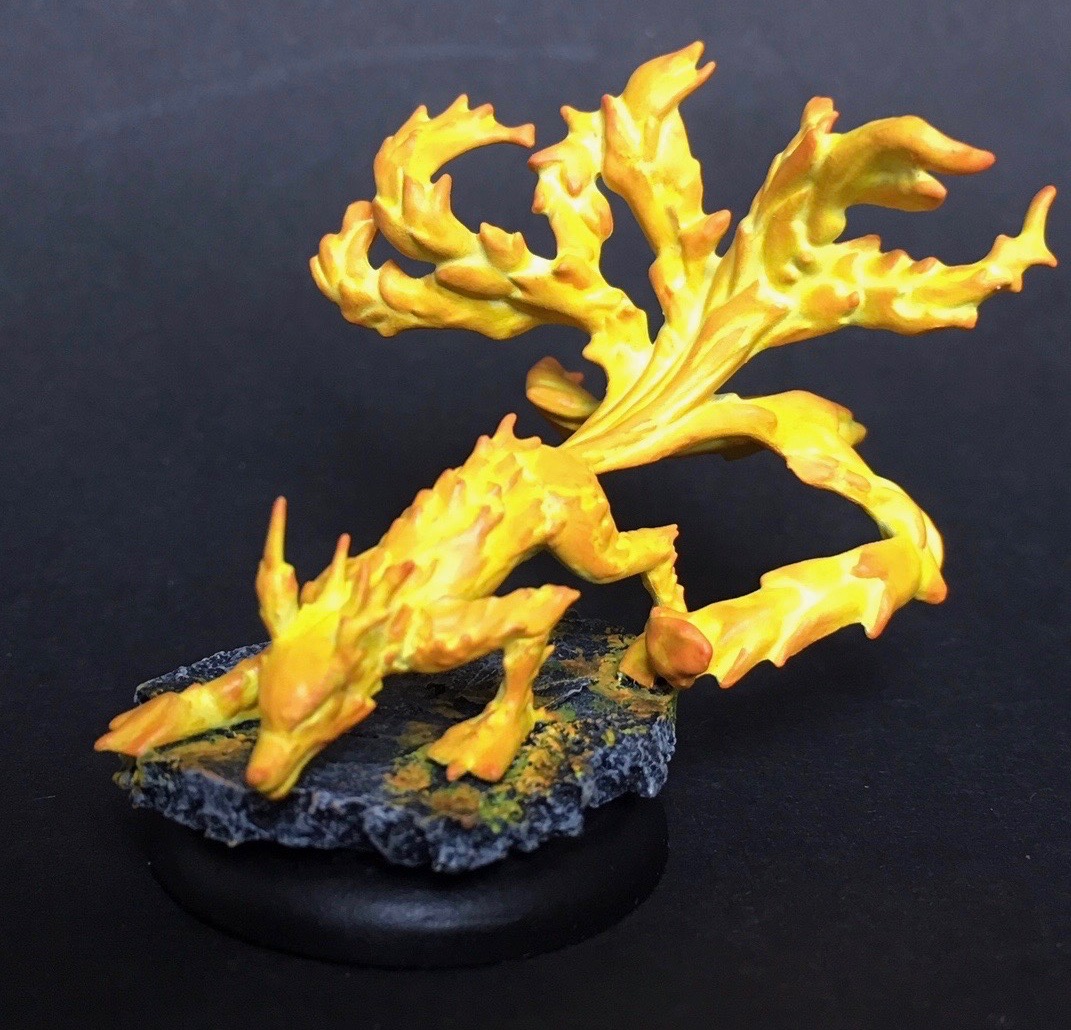
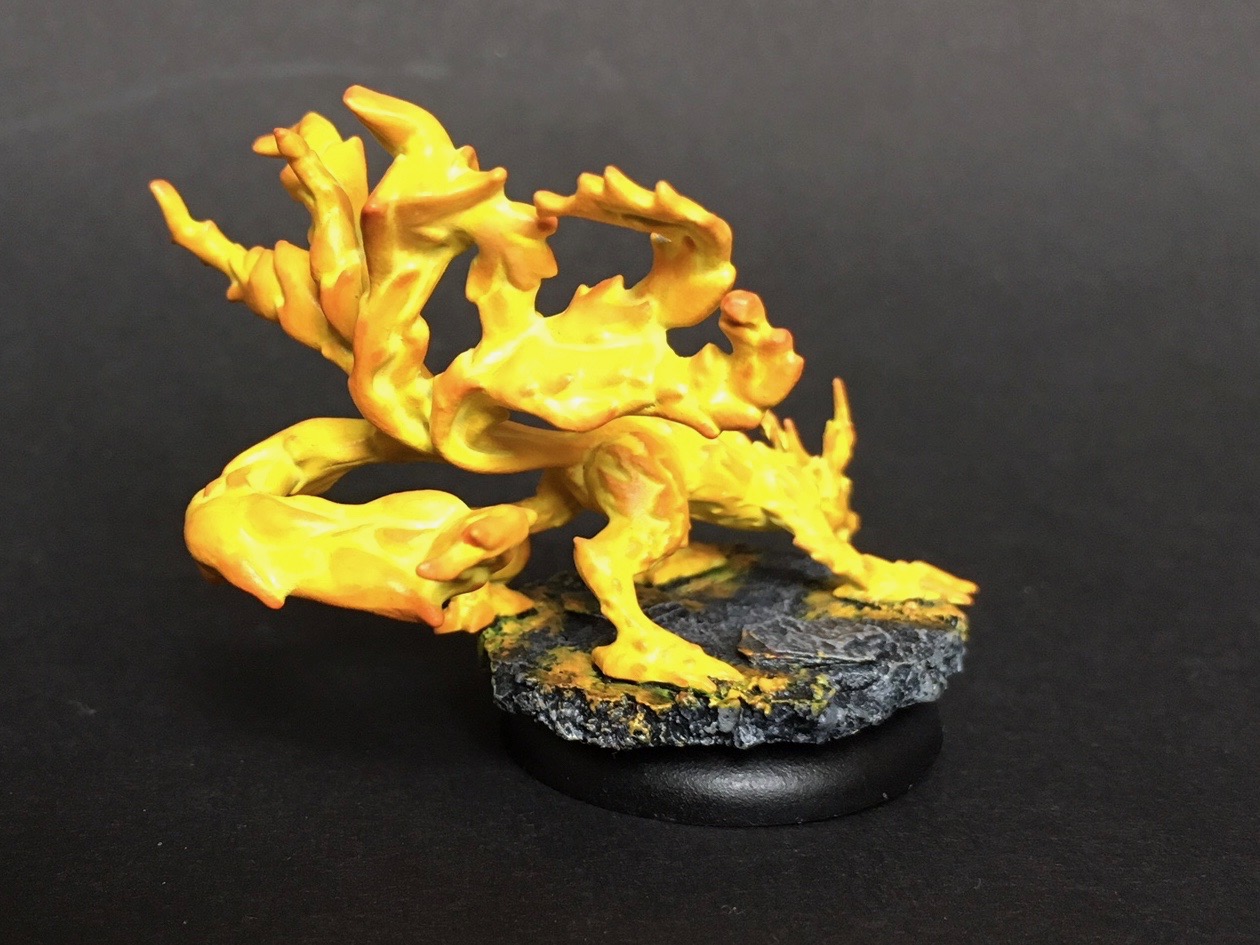
Misaki’s totem was only slightly less intimidating than Ototo. I watched several youtube tutorials first (I recommend Dr. Faustus painting clinic) and decided to do it the hard way, namely doing the flame tips darker/ more orange and the crevasses lighter. This “inverse highlighting” is really difficult, but fortunately I had been warned. The main advice I have is not to try using a white wash; it doesn’t work, don’t ask why. So you end up blending all the tongues of fire individually, which is a pain in the neck. You definitely need a wet palette or at least some dry retarder. But in the end I was quite satisfied. I think one could go for a more reddish orange towards the tips of the flames – more contrast would result in a more striking look – but as it is it is probably closer to what real fire looks like. The “object source lighting” (osl) effects on the base started as paint spilled over. I didn’t spend much time on it and it looks OK from the distance. Once I have more experience with osl painting I might go back some day and improve it.

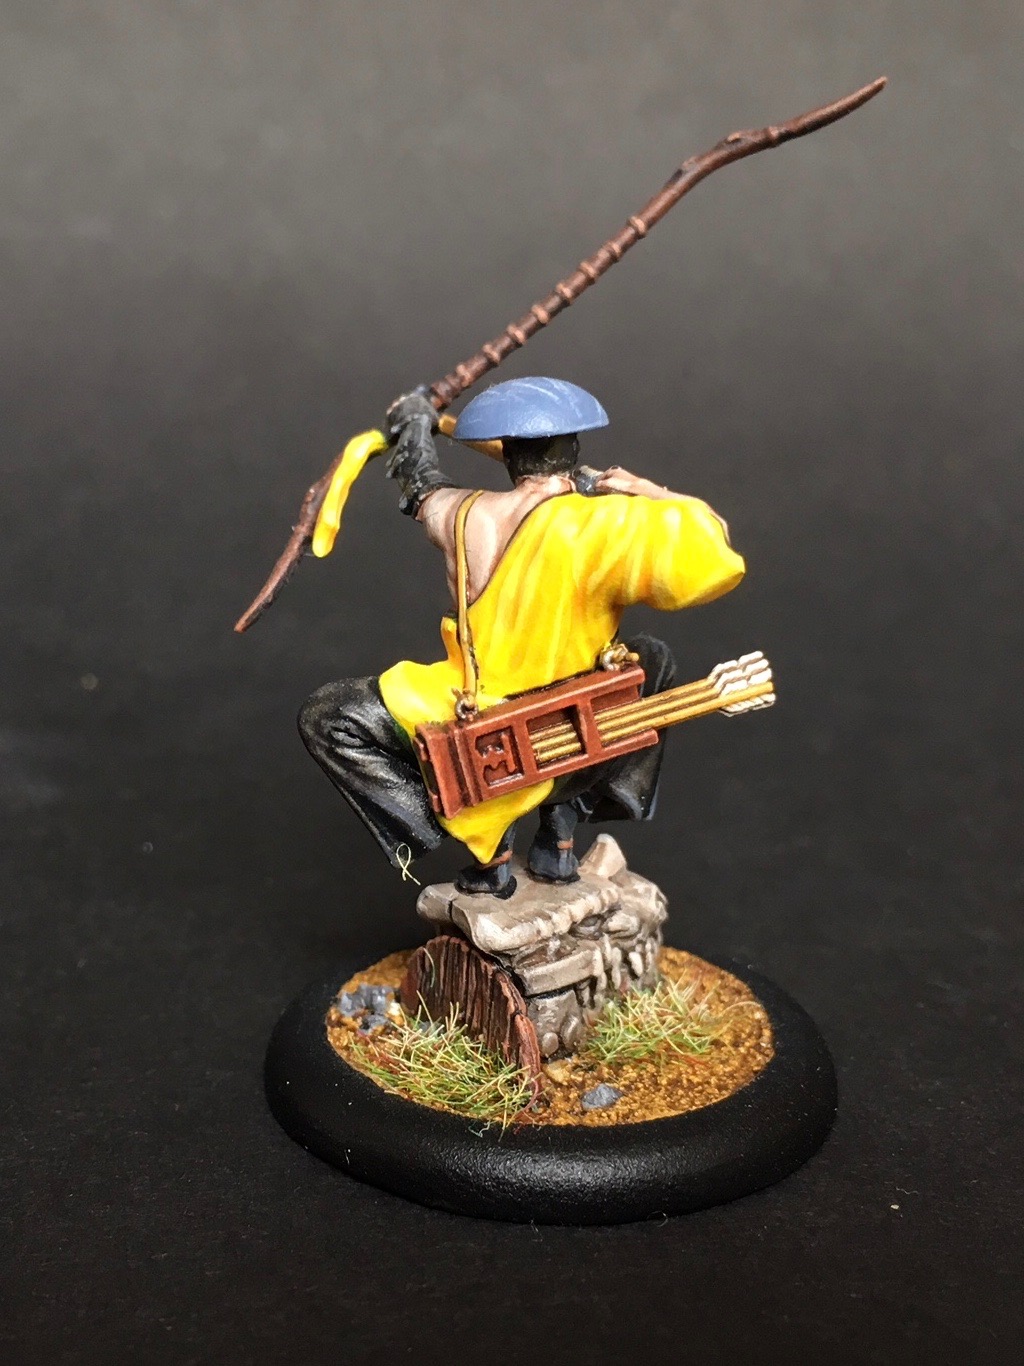
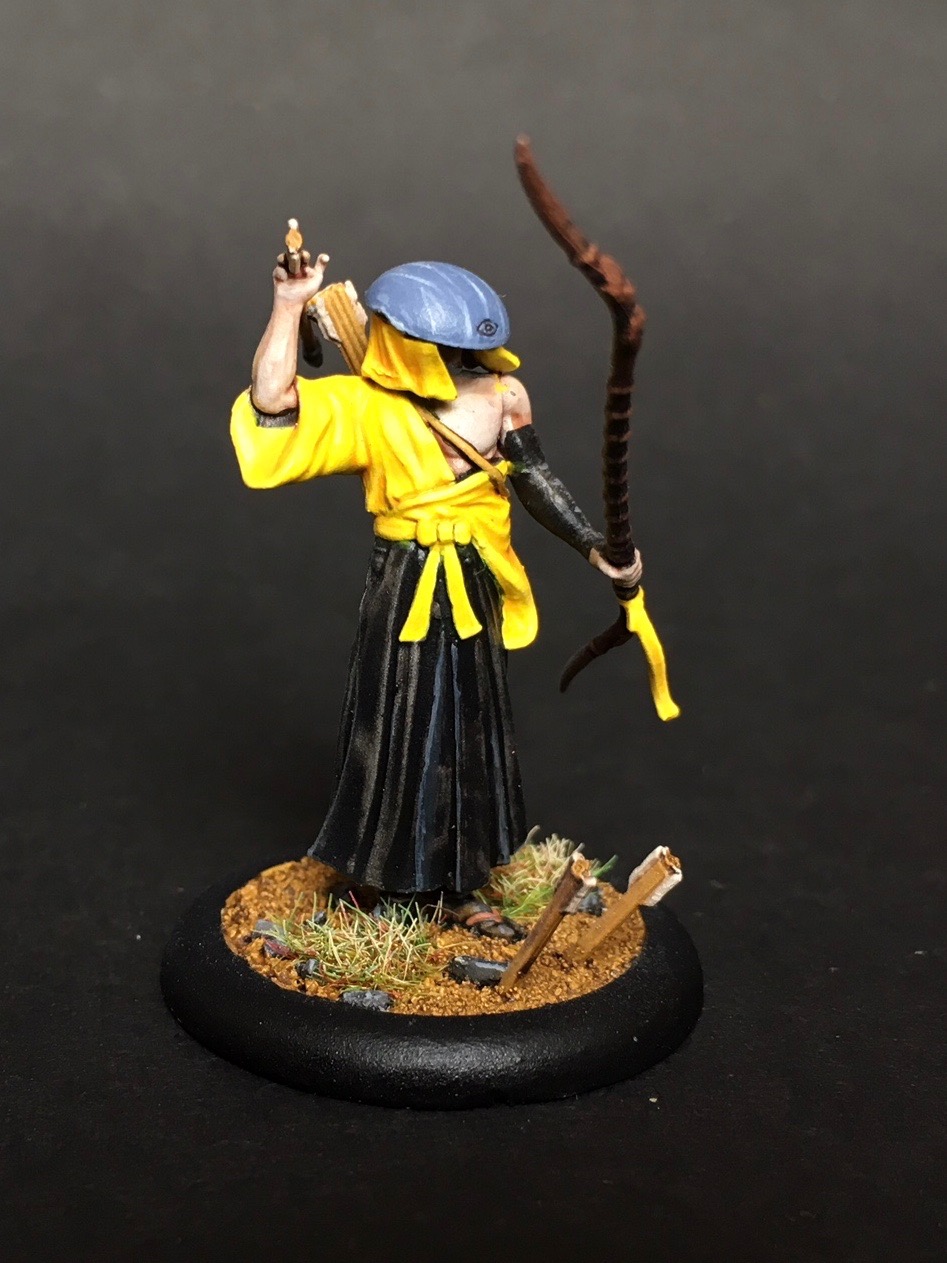
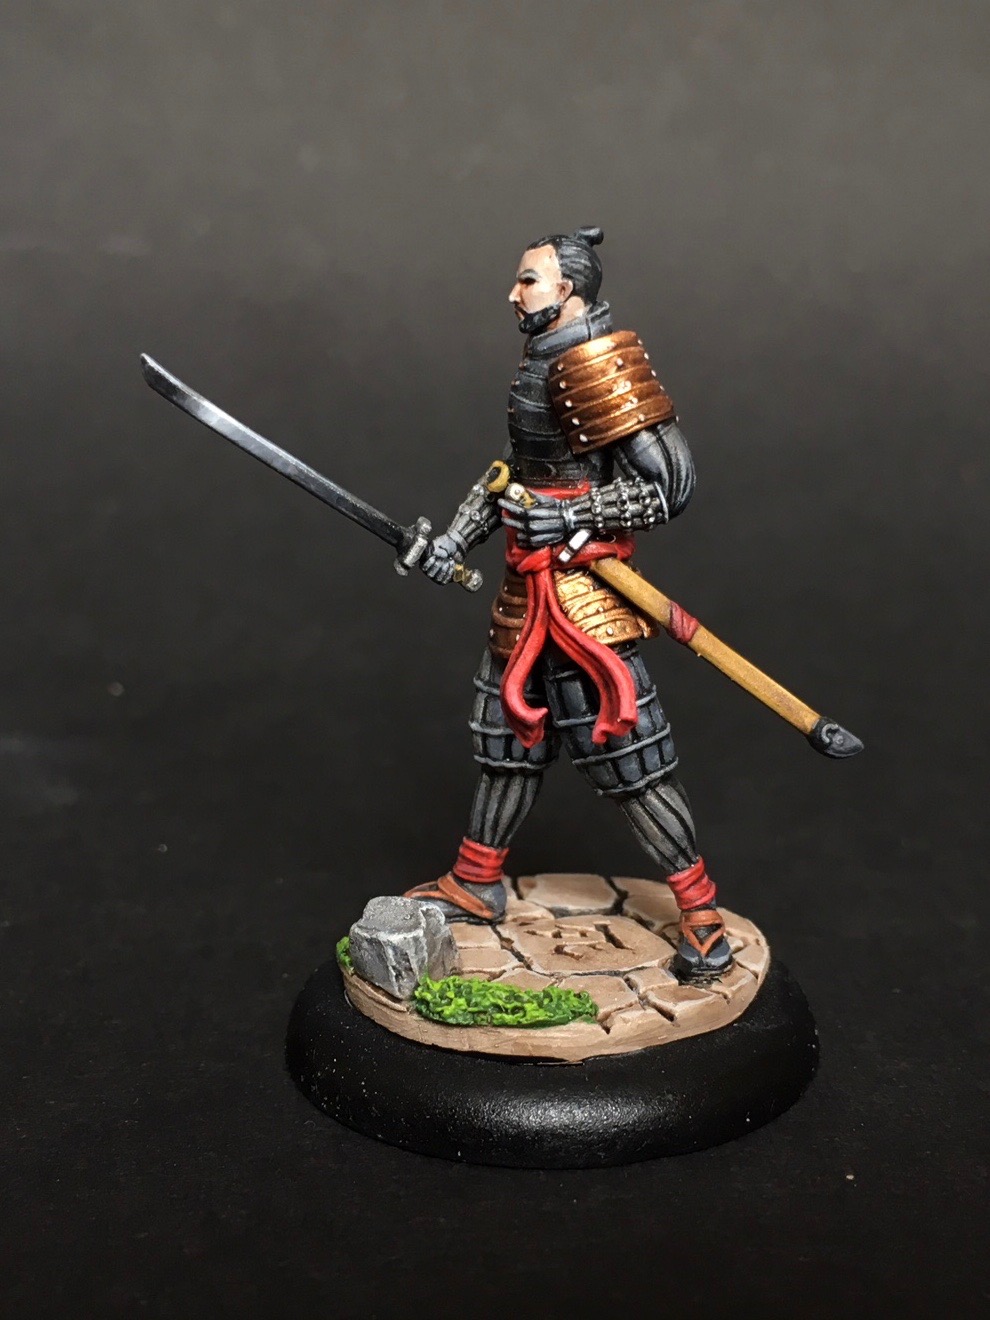
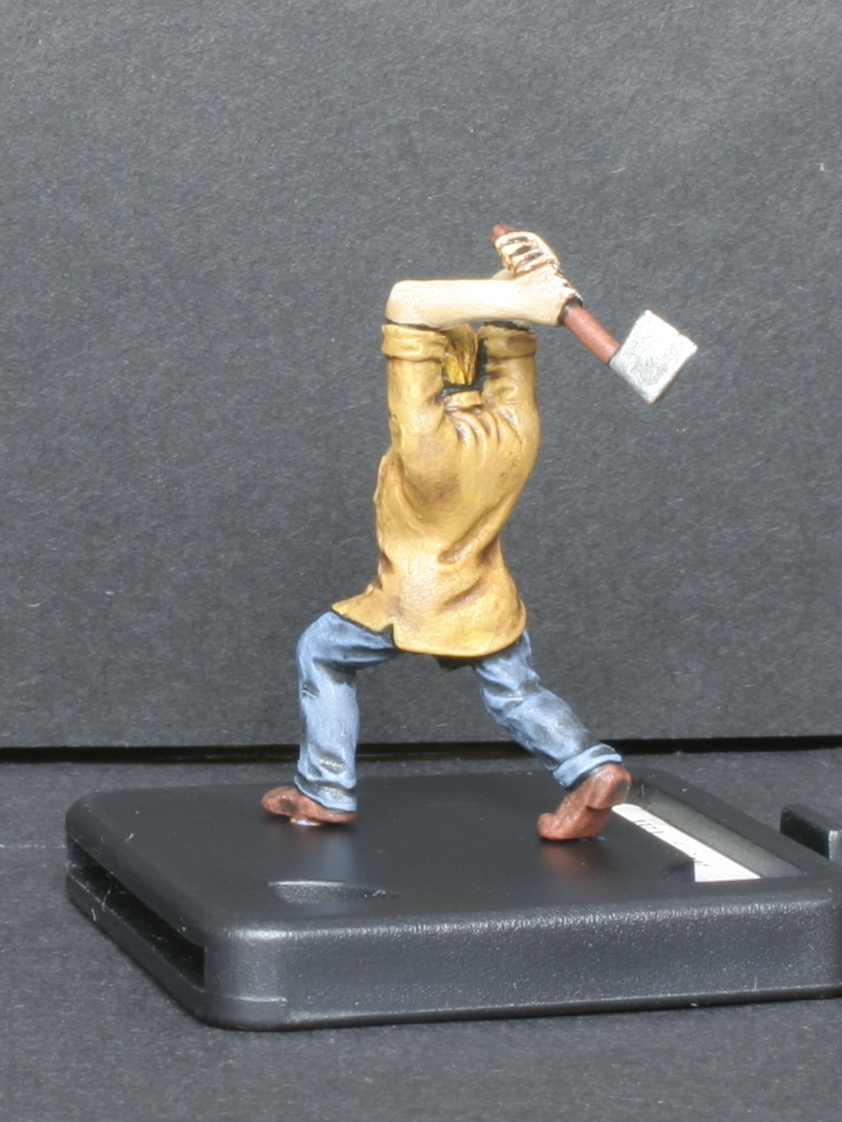
Ototo, Ten Thunders Henchman


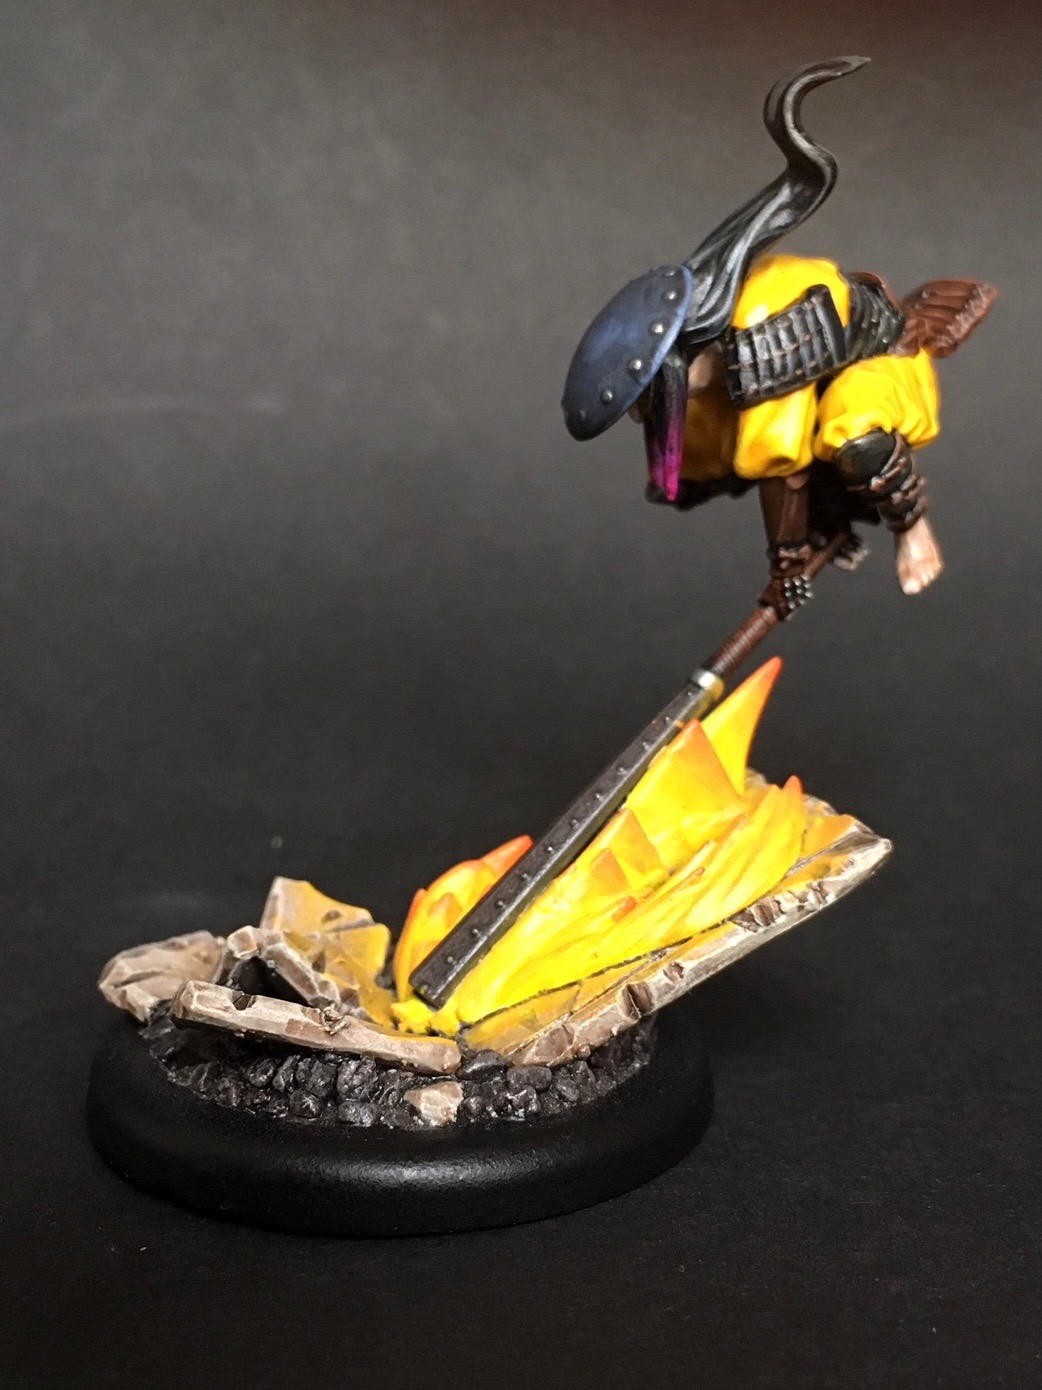
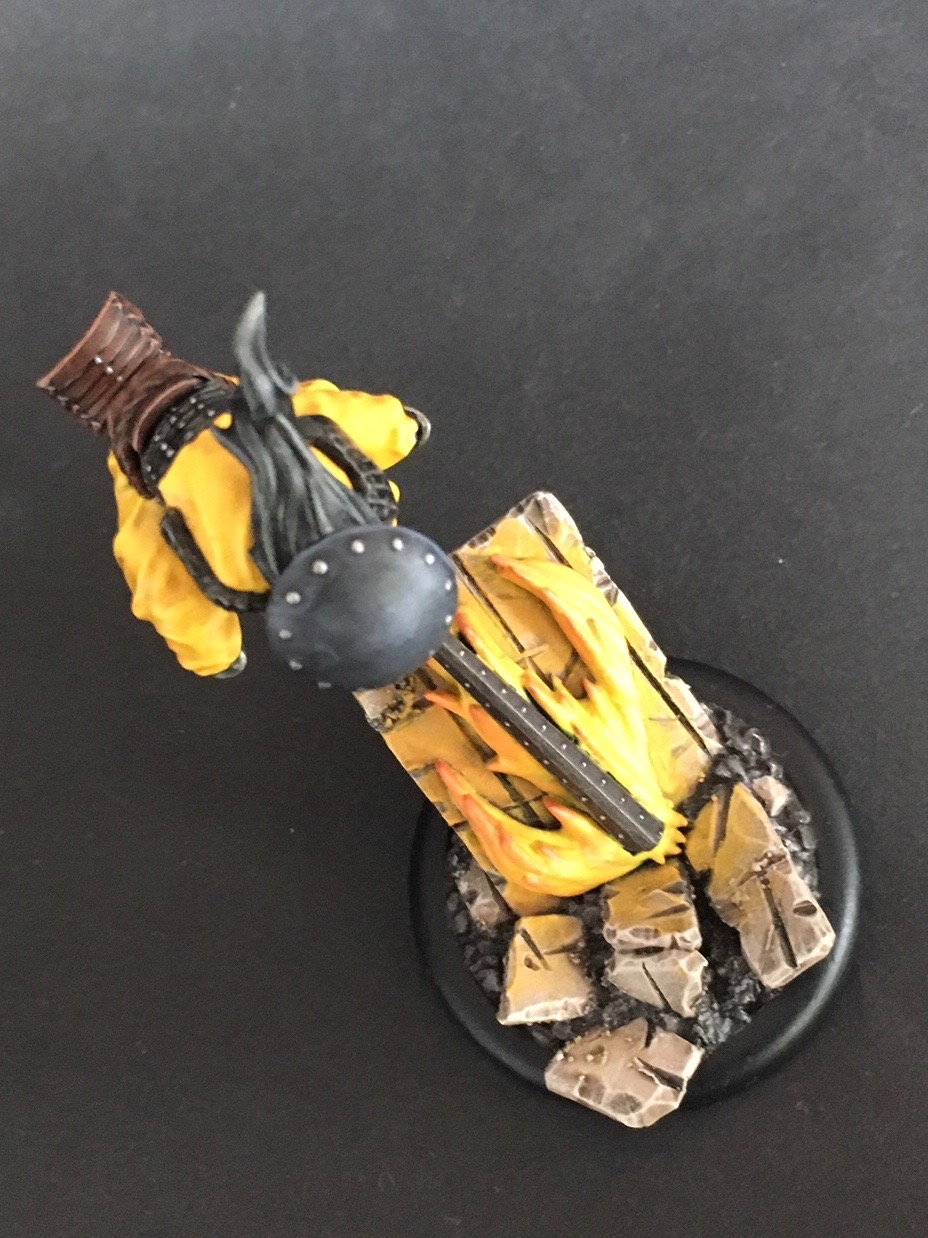
Finally Ototo. Frankly I don’t like the sculpted shock wave and did a lot of research before taking on the challenge. I used plastic board, cutting it in several pieces, chipping away at the edges, adding dents etc. It looked terrible at the beginning but the end result is what I was aiming at. Overall I feel it was worth the effort (about 3 hours, watching a documentary while doing it).

After the base I thought painting the model would be a walk in the park, as Ototo is quite bulky, but it wasn’t. One reason was that some areas are difficult to reach with the brush. Therefore I would actually recommend painting torso and legs separately and only afterwards gluing then together. Another reason was that the shoulder pads have a very weakly defined surface. Also, the model has actually more details than you would think. Lastly, the blast effect around the tetsubo took some time to paint, too. The good thing is that all the yellow clothes and flame effects tie the trio nicely together, so I am really looking forward to field them on my recently bought 3×3 Malifaux battle mat which I bought at SPIEL Essen.

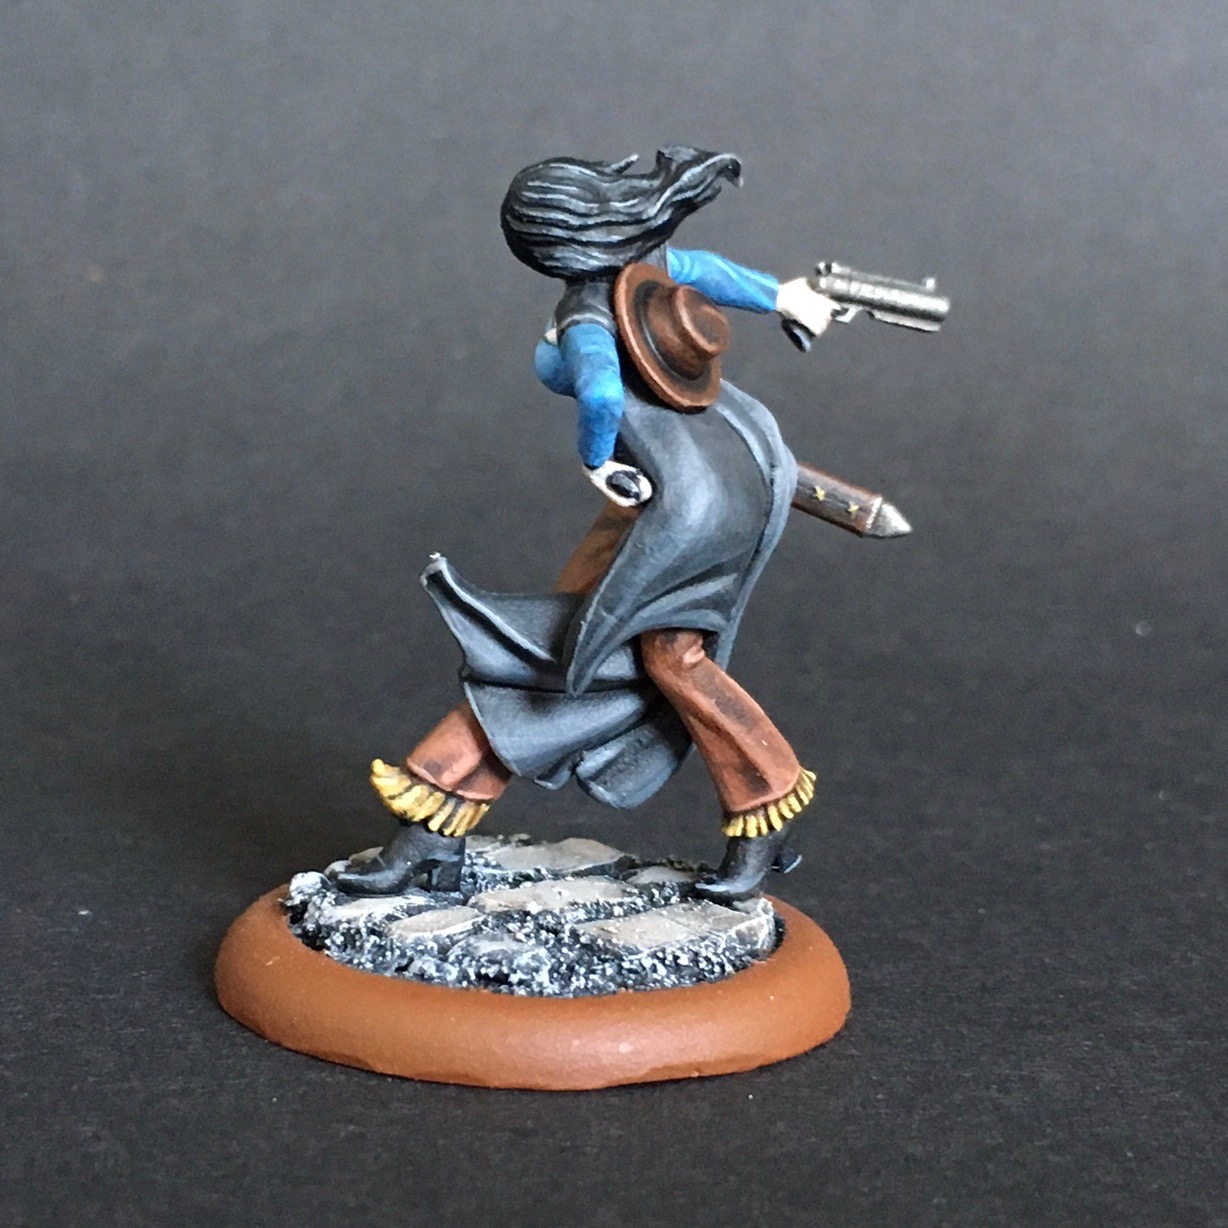
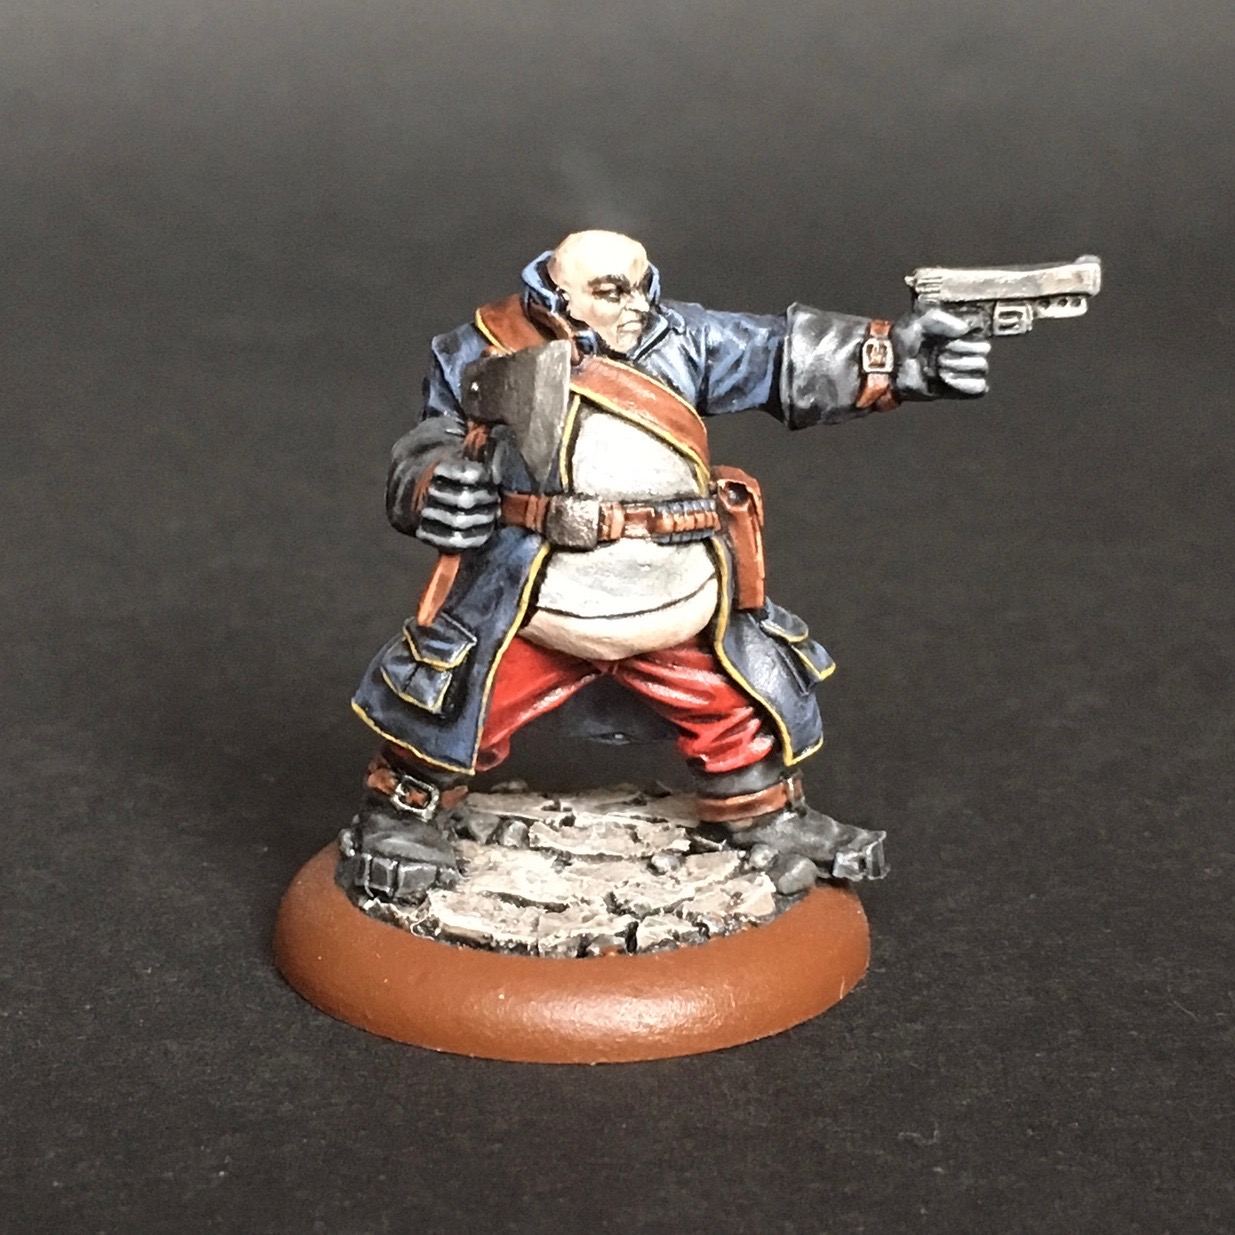
I currently have no Malifaux models left to paint but I just ordered the Lady Lustice box set, Allison Dade, Mr. Graves, the Pathfinders, Ten Thunders Brothers, and Jorogumo, which should keep me busy until SALUTE 2018. Let me know which models you would like to see painted next, and I see what I can do!

Malifaux – Ten Thunders Torakage

Torakage belong to the “Last Blossom” sub-faction of the Ten Thunders, specializing in stealth and infiltration

Coming with the Misaki Ten Thunders box, these dudes are basically the ninjas of Malifaux. The sculpts are great, making the washes do most of the shading for you; and the poses are classy, too. I continue trying out different base variants, extending my repertoire of basing techniques. Since you usually field just one or two of the ninjas you can pick the one with the base fitting best to the terrain.


While on the box art these guys are clad in yellow I wanted to paint at least one in black, the typical ninja outfit. All-black was to boring , however, so I painted parts in red to make him stand out more. Since his feet are too wide apart for his 30 mm base I used a piece of slate from the local quarry onto which the model fits perfectly! Again, the idea was that the base complements the model itself; and the easiest way to support a black model was a black rock.

Painting the model I started with the red fabric. The lower part of the knives stuck on the kilt are actually not the blades but pouches, a mistake I realized when painting the third model where I got it right. But the details are so subtle sometime that mistakes as these are bound to happen. I painted the rest of the model grey and then used a mix of black wash, medium, and regular black paint. I subsequently took some time – since there are not many details to paint – for the highlights, really trying to get some smooth color blends. In the end I made such a good progress that I went for nonmetal metal on the blades, which blended even better in the overall black-grey appearance. Looking back I am really happy with the result – don’t know what I could have done better (except painting the pouches properly).


My second favorite sculpt of the threesome. For the remaining two Torakage I went with the official box art color scheme, only replacing the bright yellow with an stronger ochre tone. For one thing the ochre (GW Vermin Brown/ Zamesi Desert) has a much better opacity than yellow, and it can also be more easily and convincingly shaded than yellow. For shading I used GW Agrax Earthshade. If I could have only one wash in my collection, this is the one I would choose, even above black wash. It’s so universally usable! After the wash I only did some very sparse highlights with an ochre-white mix. There is not much more necessary, really, as the wash does 90 per cent of the work for you.

The larger black rocks are actually pieces of plastic with edges chipped off, so I could glue plastic on plastic, though I managed to drill a whole through the foot and pin it to the rock for added stability. I spent some more time highlighting the chain since I really wanted add depth to the chain links.


This is probably the least classy model. The base is actually a sculpted base by Wyrd; never thought I would spend money on sculpted bases. (I think I got the blister so the order would be postage free.) Color-wise, as with all the Torakage, I really limited my color palette, refraining to use, for instance, different colors for the knee or arm protectors. It’s tempting every time (all these colors I have that want to be used!) but in most cases the model benefits from a limited palette, especially if it is well sculpted and there is so much going with respect to shades, highlights and composition/pose, as it is the case with the Torakage.

Malifaux – Oiran

Oiran from the Ten Thunders Faction. You better do what they say.

Another box from my first Malifaux purchase at Salute 2017, the Oiran are some sort of geisha spies from the Ten Thunders faction. I had a traumatic experience with them when the matt varnish spray resulted in a powdery white cover. Since I used strong, vibrant colors with the models I had to repaint about 75 percent of them. D’oh! A quick research in the internet revealed that this is a widespread issue with matt varnish spray, and there are literally hundreds of blog entries on the topic. In this case the newly bought GW spray can was apparently from a bad batch.


This is the first model I painted and I like it the most. It’s probably because the freehand work on the kimono, though easy, came out better than expected. You can still see the white speckles from my matt varnish spray on the jade green dress and on the hands, which I didn’t bother to repaint. The face is ridiculously small and I couldn’t put down to red dots in symmetry. The highlights on the hair look very strong on the photo but in real life they come out just fine. All in all it was fun to paint.


After the varnish accident I had to repaint the hair, stockings and weapon of this mini. The other parts still have a greyish veil – the colors were much stronger and brighter before. It still bugs me when I think about it. The stockings looked much better before – it took almost one hour to paint them the first time – but couldn’t motivate myself to spend as much time again.

I tried to do some wood for the bases as I have never done wood before. Here I used matches for the floor and put some pieces from the backside of Warhammer plastic shields on top. The reason for this peculiar design is that I wanted to glue the model directly onto a plastic surface, as it is tiptoeing on geta/high heels and the strongest bond you get is with a plastic-plastic connection (pinning again being out of question). It looks kinda odd but at least it stands firm.


This model took me longer to paint than the other two, main reason being the fans. In hindsight I feel I used too many different colors – should have made that orange fan purple, too. Again you can see the parts which still have a white varnish-dust (stockings, base, right fan). I refrained from doing freehand patterns on the fan even thought I was tempted. But that “dust varnish” experience had broken my spirit and at that point I just wanted to get the models finished and start something new. I guess I still can come back later to add some fancy patterns.

Malifaux – Lone Swordsman and Ten Thunders Archers

Lone Swordsman and Archers from the Ten Thunders Faction

After finishing the Guild models I bought with the Starter Set I went ahead to paint the Ten Thunders models I bought at Salute. Let’s have a look at them.


Before I get to the paint job, a word of warning: the kit is awful to assemble. Check out the various tutorials on the web before you start assembling them or you will meet your Waterloo. 20 years of modeling experience didn’t prepare me for this. The head is the worst part, consisting of 4 parts (the veil is made of 2 pieces), three of which fit ambiguously into sockets and all need to be glued simultaneously. I had to scrap a veil of one model. The finished models look very nice, however. I read somewhere that the archers were some of Wyrd’s early plastic box sets (alongside the Ten Thunders and Jacob Lynch boxed set), and it shows. More recent models are said to be better, very much hope so.


Painting was the easy part, really. Although yellow is a hard color to highlight, I used a rather quick and easy method, painting the parts in a very light yellow (GW Bad Moon Yellow, yes I am that old) and then adding some thinner medium (GW Lahmian Medium) to Golden Yellow (Yriel Yellow) and using that mix as a wash. I then added some white to the Bad Moon Yellow and sparsely highlighted the model. You can achieve better results with building up the colors but this is a much faster way. After some more experience with yellow I now go with a mix of Golden Yellow, Anthrax Earthshade and medium, which makes the shadows more shadowish and less yellowish. Check out my Ototo (upcoming).

I also discovered an easy way get nice shades and highlights on the black trousers (which you should paint before the yellow parts): Just paint the trousers white and paint over them with a mix of medium and black. I’t important not to use water, and this mix is also not the same as black wash (or Nuln Oil). This creates deep black shades and almost perfect highlights. The only disadvantage is that adding highlights didn’t work very well since grey, even if it has the right lightness, looks different than the white shining through. So if you look close enough you can see the difference between the raised parts where the white shines through and the parts were I added a grey highlight.


The other challenge was to glue the models to the bases, especially the one above jumping sideways. I went for the right way (don’t do it the Homer Simpson way!) and ruthlessly pinned the trousers because the true scale bunion just is too small for the smallest drill. I planned to cover up the pin with some moss but ended up leaving it as it is since it is barely visible anyways.


Finally the Lone Swordsman, a samurai, really. As a kendo practitioner I feel a strong bond to this guy. And he has some  cool rules. One – “You shall not see another sunrise”– reactivates him while declaring to kill another character. If he doesn’t kill at the end of the turn, he commits seppuku. Awesome!

Paint job was fairly straightforward, using the same method for painting black as with the archers. In hindsight I would have better painted that lower arm protector brown as well. I consciously try to limit my color palette, but in this case some more wouldn’t have hurt. I went for nonmetal metal with the sword, just copying what another guy had done. The face was scary, he has a beard but it is so small you have to imagine it. Especially the mustache part was hard. I also used gloss varnish for the breast amor because the Japanese lacquered a lot of their amor parts.


Malifaux – Guild Guards and Guard Sergeant

A Guard Sergeant leading two Guild Guards

I bought the Guards at Salute to complement the Guild models from the Starter Set. Turns out nobody uses them because game-wise they suck. However, this won’t matter much in my non-competitive gaming group, as we are playing tabletop games for the fluff and the fun. The Guard Sergeant is a 1st edition model, the only metal miniature in my Malifaux collection so far.

Guild Guards, Guild Minions

I like this model a lot, one reason being that I like the Western theme. It shows that you don’t always need a lot of trappings or dynamic poses.


With the female guard model I tied to push the boundaries of my painting skills a little further, taking more time for the highlights than I usually do and using drybrushing only for the pants. No major frustrations during the paining process, even the face was not too much of a hassle.


Guard Sergeant, Guild Enforcer

I got this model as a bargain buy and will use it either as Guard Sergeant or as Captain Dashel from the Lucius box (not interested in the other minis from the Lucius box). This is the only metal miniature so far in my Malifaux collection. Most 1st edition metal minis have a different style than the new plastic ones, but this model fits in quite well despite not being true scale like the other Guild guard models. He was fun and easy to paint, taking me around 3 hours to finish. Just applied the base colors, painted the whole thing with black wash, and did some highlights. For the coat I actually used a mix of drybrushing and highlighting – these techniques are not incompatible opposites. I started drybrushing with only half-dried color and then smoothed the raised areas by painting on some highlights.

Malifaux – Guild Riflemen

Guild Riflemen, taking aim

I bought these models with the Starter Set because I they looked like cool sniper dudes. Not only are they stylish, they also turned out to be easy to paint. The actual painting was done over one weekend. Assembling the models and doing the bases took probably as long as painting them. I carried the rock/cork bases a bit further this time, stacking them higher. Overall, I’m very happy with the result.

After doing some research on possible color schemes I went with the plainest option: black, slightly worn-off coats. I didn’t want to spend too much time painting them in order to get some models on the table and start playing. With probably two hours painting time per model the results are quite solid. 90 per cent of the models were painted in a dark grey and afterwards washed with blacks. I spent only little time highlighting the cloaks because I wanted them to look dirty, dusty and worn anyways. Just don’t hold them close to your eyes.


Malifaux – Dr. Grimwell and Crew

Nurse Heartsbane, Dr. Stanley Grimwell, Orderlies

These are my first Guild models, all from the Malifaux Starter Set. The subtitle to this post should be “an exercise in painting white”. The Guild models were much harder to paint than their Neverborn counterparts from the Starter Set. I went for a different technique of painting white with each model. The beauty of skirmish games is, however, that you don’t have to paint units of them.

For this group I cut out single cobblestones from plastic board I originally had bought to build custom-size regiment bases. A bit tedious, but in the end I found the results worthwhile. I filled out the bases with modeling sand, painted the sand black and the cobblestones with Dheneb Stone (almost exactly the same color as Bleached Bone I found).


Dr. Grimwell, Guild Henchman


I painted the coat white and brushed some black wash (Nuln Oil) into the crevasses, painting over the parts where the wash had spilled over. This resulted in rather stark contrasts, but as long as you don’t look from close up, it’s fine. I always tell myself it’s a gaming piece not a display piece. After spray varnishing the model I added some Blood for the Blood Good color.


Nurse Heartsbane, Guild Enforcer

Here I went with the “build you paint up from dark to light” starting with a cold (blue-ish) grey. Beforehand I saw several youtube vids with people explaining and showcasing this technique; I always asked myself: this takes ages, is it really worth it? Admittedly, the color blending is much smoother compared to the other models, but this took me so much longer, and at arm’s length, it doesn’t look much better.

Another thing, painting this model made me once more painfully realize the difference between true scale and heroic scale. When I wanted to paint a thin line between the face mask and her cheeks I found it impossible to paint it thin enough not to look odd. Took me several failed attempt to accept that “blacklining” is sometimes impossible.


Orderlies, Guild Minions


I painted the skinny orderly with a technique similar to Nurse Heartsbane, but starting with a warm (light brown / Bleached Bone) undertone which is supposed to look more dirty. In addition I painted the deeper crevasses black, the result being that the crevasses are more uneven as they should be. I particularly like the skinny model with his green mop of hair and the matching syringe liquid. It’s a really characterful miniature, not spectacular, but neat. Everything fits.

Also, I’m not a goggles fan, to be honest. I mean, what for are they wearing these in an asylum?


Beginning Malifaux! Angel Eyes and Crew

Scion of Black Blood, Angel Eyes, two Bloodwretches

After two decades of almost exclusively panting and playing GW stuff I was looking for a new miniature game experience. I knew I wanted a skirmish game – I wanted to paint different types of models, but not whole units of them – and I wanted something that wasn’t standard sci-fi or fantasy. When I stumbled across Malifaux on a hobbyist youtube channel I was immediately thrilled by the models. And after watching the excellent “Let’s play Malifaux” series by Guerilla Miniature Games I decided this was my game. On Salute 2017 I got the Starter Set and since then have been paining almost 20 models from the Guild, Neverborn, and Ten Thunders faction.

The above models from the Neverborn faction come with the Starter Set. Overall, solid pieces, fun and easy to paint, especially in comparison to the Guild models from the Starter Set which I will cover in the next post.

One thing I have learned since starting Malifaux is the difference between true scale and heroic scale. Malifaux models are true scale, so even though they are 32 mm scale and overall larger (taller) than GW models, the details (faces, hands, weapons) are smaller, in fact MUCH smaller.

Angel Eyes, Neverborn Henchman

This was the last Neverborn model I painted because it took me a while to decide on the color scheme. The artwork suggests black and grey “colors”, but painting elves and Eldar for half of my life I found it hard not to use at least one real color. In hindsight, I probably chose to go with green because having a Biel Tan Eldar army and a lot of experience painting green.

Anyway, apart from the face (eyes, eybrows!) which was a pain in the neck to paint everything else went smoothly. I covered the cloak with a thinned-down Dark Angels Green and black wash mix, drybrushed it and set a few highlights. Also, for the first time in my hobbyist career I used cork for the base. It’s a cheap and easy way to get more out of your models, to make them look more spectacular or to underline their character. So since she is a sniper model, I had her standing on an elevated position.

Scion of Black Blood, Neverborn Enforcer


Design-wise this is the model I like least; its posture is too statue-esque. The Scion is a Nephilim, some kind of demon, so I decided to go for a red skin tone. (Also, I just re-watched Hellboy.) The hardest parts were the horns and the shoes. Since there were not many details it took about two hours to paint the model.

Bloodwretches, Neverborn Minions


Painting the Bloodwretches took me only about two hours, and I found the result very satisfying. Just applying the base colors on the skin, shirt, and pants and going over it with brown and a black wash. As with the Scion, I added highlights to the skin very sparsely so it doesn’t look pink. 

Henchmen of the Old Ones – Witches, Maniacs, Zombies

Missing from the group shot are the zombies who were busy keeping up with their workout program at the gym.

Together with cultists, who will get their own entry, this are the foot soldiers of the Old Ones in Mansions of Madness. The models are certainly not spectacular, the quality being below that of more recent board games by FFG, notably Descent and its Star Wars spin-off, and nowhere near as good as the miniatures by Kickstarter ventures such as CoolMiniOrNot or Studio McVey. This being said, they still look better painted than unpainted.

Maniac1_frontManiac1_side

Maniac2_frontManiac2_side

Maniacs. I like these models much better than the witches, first for their dynamic pose, and second for their richly-textured sculpt. The latter takes care of the shading while you just add some ink / wash. I added some highlights on the pants and did some drybrushing, too, but that was all. They took me probably an hour each.

Witch1_frontWitch1_back

Witch 1. I like the idea of giving them a Bob cut, a quintessential 1920s haircut, but somehow it doesn’t fit to the other design choices. It’s a matter of taste I guess. In order to make up for the lack of three-dimensionality I spent some efforts highlighting shirt and skirt. Took me twice as long as the maniac, but not looking twice as good, sadly.

Witch2_frontWitch2_back

Witch 2. I like this color scheme much better. Maybe it’s because a Bob cut only goes with black hair.

Zombies_front

Zombies_back

Zombies. Dubbed by our gaming group “the high five” zombies, these good-natured and none-threatening undead must have been to the gym recently… Considering the wealth of cool zombie miniatures out there, they are an embarrassment to their kind. Well, at least they were easy to paint. These are good miniatures to start with if you have no painting experience, since you can try applying inks and drybrushing techniques with very satisfying results, very similar to the maniacs.

Eldritch Horrors – Chthonian and Shoggoth

These are the two big creatures supplied with the base game (two copies each). Epic boss fights are not a must in Mansions of Madness but in my experience they add to the drama and memorability of a scenario. Needless to say, they are much scarier than the cultists who summon them.

Posing for a group photo. Everybody say “Nyarlathoteb”.

Posing for a group photo. Everybody say “Nyarlathoteb”.

_MG_8812_MG_8817

Chthonian 1. A signature creature of the Cthulhu mythos, Chthonians are actually not an invention by Lovecraft himself but by a later author, Brian Lumley. They are basically slime-covered worms with tentacles – a monster archetype found across the fantasy/horror genre. A classic.

_MG_8811

Chthonian 2. I chose a simple color scheme to go with the simple shape. The painting was easy and straight-forward. Painted the body grey, applied black wash and added a few grey highlights to create stronger contrasts. I spent relatively little time highlighting the tentacles but found the overall appearance satisfying enough even without a stronger blending from dark roots to bright ends. Obligatory for all models in this entry is the gloss-varnish finish, for the slimy look.

_MG_8818_MG_8819

Shoggoth 1. This is a Lovecraftian classic, taking a prominent role in his novella At the Mountains of Madness. In order to get a painted model on the table quickly (it appears in the first scenario) I just dry-brushed layers of green over a black basecoat. I spent just a couple of minutes adding some highlights and repainting some of the crevasses black. Didn’t spend much time painting the eyes either (there are too many of them!). Despite its uneven, rough texture, the result is quite OK, especially if looked at from an arm’s length. Also, painting time was only around two hours.

_MG_8820_MG_8822

Shoggoth 2. I borrowed this color scheme from boardgamegeek user Matteo Bocci. Again starting from a black basecoat, I added increasingly brighter layers of Nauseating Blue (a GW color I bough in the nineties and still use). Only later did I realize that I went for a different effect than Matteo. While I highlighted only the raised parts, emphasizing the model’s three-dimensional texture, Matteo basically painted a web of glowing veins all over the model. The result is just awesome – check out the pic below. Overall I spent four to five hours painting the model.

Matteo_Shoggoth

The paint job that inspired me, by Matteo Bocci. I guess you would have to spend at least ten hours to get such a fantastic result.